Difference between revisions of "Level art task"
(→How To Use Trine 3 Editor) |
(→How To Use Trine 3 Editor) |
||
| Line 63: | Line 63: | ||
This page should have all the basics you need to know to learn how to use the editor. It is a lot of information and work to learn to use a new tool and to build a level so we encourage you to ask in case you run into any problems. Just send us any questions you've got and we'll help you to get back on track! The most basic necessities for any map are CamerasystemPrefab, AmbientLightEntity and ColoreffectEntity, they have been added to the map already. After that come collisions and art assets follow. There are many assets for creating beliveability and atmosphere to the level. Lights and fogs for example are very important when creating the look of the level. Try checking the Trine 3 levels and how these things are done in them, for example how waterfall effects in Amadeus's Beach Tutorial level are built. The tutorial levels are all in one level file vertically placed so for the Amadeus's level you need to travel down quite a bit to get there in the Editor. | This page should have all the basics you need to know to learn how to use the editor. It is a lot of information and work to learn to use a new tool and to build a level so we encourage you to ask in case you run into any problems. Just send us any questions you've got and we'll help you to get back on track! The most basic necessities for any map are CamerasystemPrefab, AmbientLightEntity and ColoreffectEntity, they have been added to the map already. After that come collisions and art assets follow. There are many assets for creating beliveability and atmosphere to the level. Lights and fogs for example are very important when creating the look of the level. Try checking the Trine 3 levels and how these things are done in them, for example how waterfall effects in Amadeus's Beach Tutorial level are built. The tutorial levels are all in one level file vertically placed so for the Amadeus's level you need to travel down quite a bit to get there in the Editor. | ||
| − | How to access the required map file: Collision base map is on its own map file. Go to editor, then File > Open map > Open the editor file location binary/data/mission/[test map name].fbe. The map file isn’t automatically in the editor and you have to add .fbe -file yourself from | + | How to access the required map file: Collision base map is on its own map file. Go to editor, then File > Open map > Open the editor file location binary/data/mission/[test map name].fbe. The map file isn’t automatically in the editor and you have to add .fbe -file yourself from said file location. |
== Basic windows in editor == | == Basic windows in editor == | ||
Revision as of 10:45, 8 December 2021
Contents
- 1 Level Art Assignment
- 2 How To Use Trine 3 Editor
- 2.1 Basic windows in editor
- 2.2 Basic controls in editor
- 2.2.1 Moving camera
- 2.2.2 Object selection
- 2.2.3 Tool selection
- 2.2.4 Copying and pasting
- 2.2.5 Undo and Redo
- 2.2.6 Other useful buttons
- 2.2.7 Editing objects
- 2.2.8 Editing object properties
- 2.2.9 Adding objects
- 2.2.10 Testing map in editor and saving
- 2.2.11 Some tips about the type tree
- 2.2.12 Other useful tips
- 2.3 Lighting in editor
- 2.3.1 AmbientLightEntity
- 2.3.2 DirectionalLightEntity
- 2.3.3 PointLightEntity
- 2.3.4 AmbientPointLightEntity
- 2.3.5 PointLightEntity with RenderAlphaObjects
- 2.3.6 SpotLightEntity
- 2.3.7 ColorEffectEntity
- 2.3.8 Bloom
- 2.3.9 General
- 2.3.10 BloomEntity in the editor
- 2.3.11 Properties of glowing objects
- 2.3.12 Additional Shadows
- 2.3.13 Fog
Level Art Assignment
- Your task is to complete the given collision-blocked map. We are looking for an appealing and coherent end result. Your work doesn't need to be 100% finished, but it should give us an idea of your skills with asset placement, composition and lighting.
- You can, for example, create a level art base that could be continued later by adding more detailed level art elements and assets.
- Feel free to change the level in any way you want to make it more to your liking. For example, you can continue the map and design your own area displaying your talents from blocking to the finished level art.
- You can refer to Trine 3 levels, especially the tutorial levels, for inspiration. It's not forbidden to copy some parts of the Trine 3 levels as long as you blend them with your own unique level.
- We recommend using Trine 4: The Nightmare Prince and Trine 4: Melody of Mystery as visual references as well.
- We can see your potential even from a small area brimmed with polished and high-class art - no need to stress yourself over the amount of material needed. Quality overcomes quantity every time!
Assignment info
- Create an environment using the Trine 3 editor
- The task should be completed in 4 weeks
- Familiarize yourself with the Trine style level art by reading the necessary Level Art pages.
- Once you have finished the task, please return the map file, so we can play your level and see your level art from the player's perspective.
- Record a video where you run through the level and showcase your work. We might not have enough time to play your level, so consider this video as the most important piece of your assignment and the main reference we use when evaluating your work.
- Add between 2-8 screenshots of your favorite spots on the level.
The mandatory task
- Note: You must complete the task described here to apply
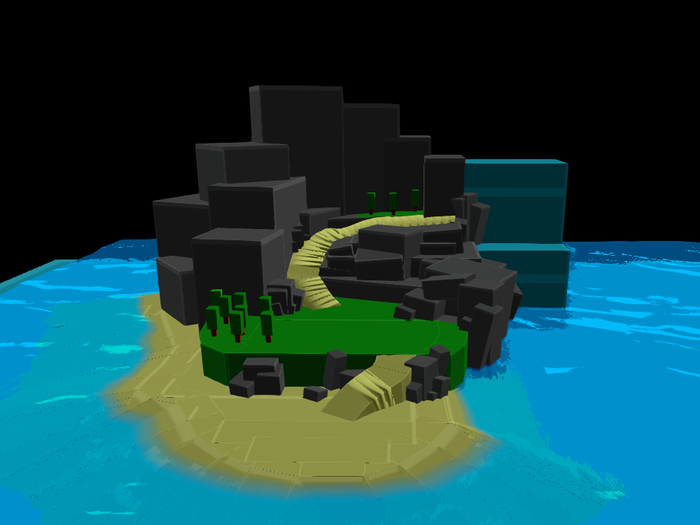
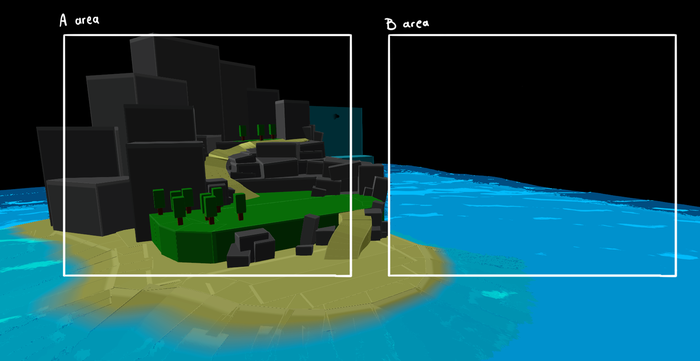
- The level has two areas: Area A and Area B. Area A comes with already-blocked collision boxes to give you an example of the terrain shapes to use
- Build your level art on top of Area A
- Build the lighting setup as well. Use atmospheric effects, like fog, to make the environment feel more believable.
- Create a strong and well-working base geometry. We're looking for something that is both interesting and visually pleasing. The level should have a clear theme.
- The most important aspects of your work are composition, asset placement and lighting.
The optional task
- Note: This part is not required to apply, but if you're willing, feel free to do it as well.
- Area B has no shapes, as we'd like to see you creating the base geometry there.
- Area A and Area B can be of the same size, but if you want to build a custom-sized Area B, that's fine as well.
- Please leave the collision box blocked shapes to the collision layer, so we can see the base shapes you've used.
You will get bonus points for
- Demonstrating your ability to transform your unique ideas to a well-executed level art.
- Using the available game assets creatively
- Polished end result
- Clean and optimal approach to level-building, making it easy for others to continue editing your level.
General Level Art Workflow Tips
- Check out the content of our Level Art sites to familiarize yourself with our level art process and the basics of level art theory. There's plenty of tips available, too!
- Don't be afraid to hijack our assignment and take it in any direction you want to, as long as it shows off your abilities as a level artist. We want to see your visual level building skills, so show them the way that suits you best.
- You can use any assets in the Editor, but try to keep your level coherent and sensible. On the other hand, don't forget that Trine is a fantasy world where anything is possible.
- Keep the limitations of the real-time 3D in mind when creating the environment and use assets with optimization in mind.
- Keep the collisions on the collision layer and add art on the art layer.
- Pay special attention to the composition, asset placement and lighting, as those are the aspects we're most interested in.
- Start with the big shapes. When they are satisfactory, concentrate on the finer details. Use an iterative approach, building the whole level layer by layer.
- Do not scale the objects too big, causing the texture resolution to suffer. A good rule of thumb is that you can scale an asset 20% bigger or smaller than the original size. You can, of course, break these rules if the final result looks amazing.
- Don't forget the lighting, but carry it along the whole level art process starting from the very beginning. Considering lighting implementation is crucial when placing assets into the scene - and so is adjusting the lighting while progressing with the level art.
- The assets can be used in many ways: Don't let obvious approaches or any assumed purpose restrict your creativity! As long as it looks good, anything is allowed.
- When creating a level for an actual game project, you need always to consider gameplay aspects carefully. In this assignment, however, we're evaluating your artistic eye, so don't worry if your gameplay isn't fine-tuned. For example, it's not crucial to match all the collisions perfectly everywhere.
- Remember to test your level with actual characters and run around in your level. We're looking only at those things that the player can see through the cameras while playing the level.
- To come up with interesting ideas for your environment, we recommend using real-life geography and/or architecture as reference material. For this task, you can also use other games (especially Trineverse games) as references.
- Don't worry too much if using the Editor feels difficult at first. Focus on showcasing your skills at creating believable environmental settings by building appealing shapes and lighting arrangements.
- You'll use the publicly released Trine 3 Editor for this assignment. Our current in-house Editor differs a lot from the Trine 3 version since it has undergone a lot of upgrades and improvements. For example, it has a new renderer with pbr materials and a lot of new assets that are all missing from the Trine 3 Editor.
- If we'll hire you, you'll be trained to use our latest Editor version.
- If you have problems with the Editor, please don't hesitate to contact us.
How To Use Trine 3 Editor
This page should have all the basics you need to know to learn how to use the editor. It is a lot of information and work to learn to use a new tool and to build a level so we encourage you to ask in case you run into any problems. Just send us any questions you've got and we'll help you to get back on track! The most basic necessities for any map are CamerasystemPrefab, AmbientLightEntity and ColoreffectEntity, they have been added to the map already. After that come collisions and art assets follow. There are many assets for creating beliveability and atmosphere to the level. Lights and fogs for example are very important when creating the look of the level. Try checking the Trine 3 levels and how these things are done in them, for example how waterfall effects in Amadeus's Beach Tutorial level are built. The tutorial levels are all in one level file vertically placed so for the Amadeus's level you need to travel down quite a bit to get there in the Editor.
How to access the required map file: Collision base map is on its own map file. Go to editor, then File > Open map > Open the editor file location binary/data/mission/[test map name].fbe. The map file isn’t automatically in the editor and you have to add .fbe -file yourself from said file location.
Basic windows in editor
Object properties
Show Object Properties dockable window using View > Object Properties or using Ctrl + P.
With this window you can modify object's properties.
The properties inside components can be set in alphabetical order from the editor settings: Tools > Options > Properties > "Order Properties In Property Grid".
Components and properties can also be searched for inside the window.
Scene instance tree
Show Scene instance tree dockable window using View > Scene instance tree or using Ctrl + F2.
With this window you can see all instances in the scene/level.
Type tree
Show Type tree dockable window using View > Type tree or using Ctrl + F3.
With this window you can find entites/types which can be inserted into scene/level. For example all the 3D art assets, lights and fogs can be found here.
Category
Show Category dockable window using Categories > Category root or using Ctrl + Shift + F1.
Category window is a configurable window, where you can insert shortcuts to entities/types which you want to insert into scene/level.
Resource tree
Show Resource tree dockable window using View > Resource tree or using Ctrl + F4.
With this window you can see all the resources which are available.
Recent objects
Show Recent objects dockable window using View > Recent objects.
With this window you can see recent types you have used.
Modules
Show Modules dockable window using View > Modules.
With this window you can modify Module properties which affects various things in editor / engine.
Error list
Show Error list dockable window using View > Error list.
This window shows errors, warnings and info messages generated by editor and engine. Very usefull tool for debugging what's wrong.
Reference list
Show Reference list dockable window using View > Reference list.
When selecting some type or instance you can see ReferenceString property in the Property Window and by clicking it with mouse right button and selecting Show Reference list from the context menu, you can print type's or instance's reference list into this window.
Basic controls in editor
Moving camera
- WASD - Move camera
- Shift + WASD - Move camera faster
- Right mouse button and drag - Rotate the view
You can also press any of the axes on the editor gizmo on the right upper corner. Pressing on the axis changes the camera rotation to coincide with that axis.
Object selection
- Left mouse button - Select object
- Alt + Left mouse button - Select object behind another object (You may need to click multiple times to select the desired object)
- Shift + Left mouse button - Select multiple objects
- Ctrl + Left mouse button and drag - Box select, select objects in area (if you are selecting a vast amount of objects at once it can be a good idea to de-select View->Tree Update Enabled so the procedure will be faster, but do remember to re-select it after, otherwise you won't be able to operate the object properties)
Tool selection
- 1 - Move tool
- 2 - Rotate tool
- 3 - Scale tool
- 4 - Area tool
- 6 - Scale specific side tool
Copying and pasting
- Ctrl + C - Copy selected object(s)
- Ctrl + X - Cut selected object(s)
- Ctrl + V - Paste copied object(s)
- Ctrl + Shift + V - Paste copied object(s) onto the same coordinates they were copied from
- To duplicate an object, hold Shift and move object from one of the arrows while having move tool selected
- You can copy & paste items between separate levels too
Undo and Redo
- Ctrl + Z - Undo
- Ctrl + Y - Redo
Other useful buttons
- Space bar - Toggle between Global, Local and Screenspace transform and rotation
- K - Allows you to see lights through collisions
- J - Makes the lights stay the same size no matter how far you are from them
- Ctrl + T replaces selected instance in the scene with the type selected in type tree
- L - Hides lights
- G - Hides lights and all objects that don't have the VisibleInGame on
- P - Selecting an instance within a scene and pressing P Locates selected instance in the type tree
- Ctrl + G - Hides grid
- Control + Left click on a layer hides it.
Editing objects
Click an object you want to edit in the level. Three arrow or circles should appear depending on what tool you have selected. Use these arrows/circles to move, rotate and scale the object on X, Y and Z axis. Note: You can select objects only from currently selected layer. Change layer by clicking Def., Col., 1, 2... from the tool bar or with Alt + 9, 0, 1, 2, ...
It's also possible to choose objects on any layer if you want to. Go to Selection -> Selection filter locking and untap the Allow selection on active layer only.
Just make sure that you keep objects on their dedicated layers if you decide to use this.
Editing object properties
To edit an object's properties you need to open up the Object Properties dockable window via View > Object Properties and then selecting the Object you want to Edit.
Adding objects
Objects can be added from Type tree window. You can open it from View > Type tree. Use the Search field to find the objects you are looking for. Most of the time objects you want to use are located under TypeRoot/InstanceBase/Entity. Also remember to deselect any selected objects in Type tree before searching again.
Finding the right object from the type tree can be quite tricky if you don't know the exact name of the object. A good way to start is to copy them from existing maps.
When inserting objects, you can press and hold Shift and/or Ctrl. Holding Shift attempts to snap the object next to another object, when you move the object above an object already on the scene. Holding Ctrl snaps the movement of the object to the grid.
Testing map in editor and saving
To test your changes in editor press green play button (F5) to start the level or blue play button (Ctrl+F5) to start from camera position.
To return to editor from play mode, press the blue stop button (Shift+F5).
Some tips about the type tree
TypeRoot -> InstanceBase -> Entity -> ObjectEntity -> object You will find all the objects here
TypeRoot -> InstanceBase -> Entity -> LightEntity You will find all the lights here
Finding items in type tree can be a little bit tricky at times as some tiny problems may occur. When you search for something that has multiple types under it they might not show for some reason. For example if you search for RockCollisionHelper in the type tree it might only show the RockCollisionHelper instead of all it's variations like BookRockCollisionHelper etc. This can be fixed by either searching again by typing the desired thing in the search bar or manually clicking the tree to find it. Also after using one object and then trying to find another object in the type tree, make sure to check the object you used isn't active anymore. Otherwise the Search bar won't search anything. You can just click anywhere in the empty part of the map to make sure you don't have any object active.
Other useful tips
Tools -> Options -> properties -> Order Properties In Property Grid to get properties in property window ordered alphabetically
Tools -> Options -> Tool -> Selection highlight self illumination enabled to get rid of the blue highlight when selecting objects
The collisions have VisibleInGame on in this map so that you can see them when you play. It's good to turn them of after you have addded art on them so that you can take a better look at the art. You can make the collisions invisible by choosing the collision, going into its properties and tapping VisibleInGame off from the ModelComponent.
How to get FBX assets from the library: Type tree has all the assets (https://wiki.frozenbyte.com/index.php/Level_art_task#Type_tree), choose TypeRoot > InstanceBase > Entity > ObjectEntity > object. Component base has the same listing but they can’t be accessed, so make sure you choose InstanceBase and not ComponentBase. Click an asset on the list and move cursor to viewport, and the assets should appear on the cursor. Type tree also has a search function but it has known issues and won’t always work, so you need to be prepared to access files manually as described above. Remove the search word if you want to see all assets and not only limited results.
Resource tree only shows all assets already in the level, it can’t be used to access new ones.
Lighting in editor
This page lists the most important LightEntities found in the editor and sheds some light (no pun intented) on their usage. There's a lot of general information about lighting in 3d games and related topics in the internet and elsewhere, so the interested reader is encouraged to do some independent searching for more in-depth discussion. Don't be discouraged by the large number of different properties that the LightEntities might have, most of them work with their default values.
What follows is a general overview of the different light entities you can find in the editor. In addition to general discussion, there are some examples of how each entity should be used.
AmbientLightEntity
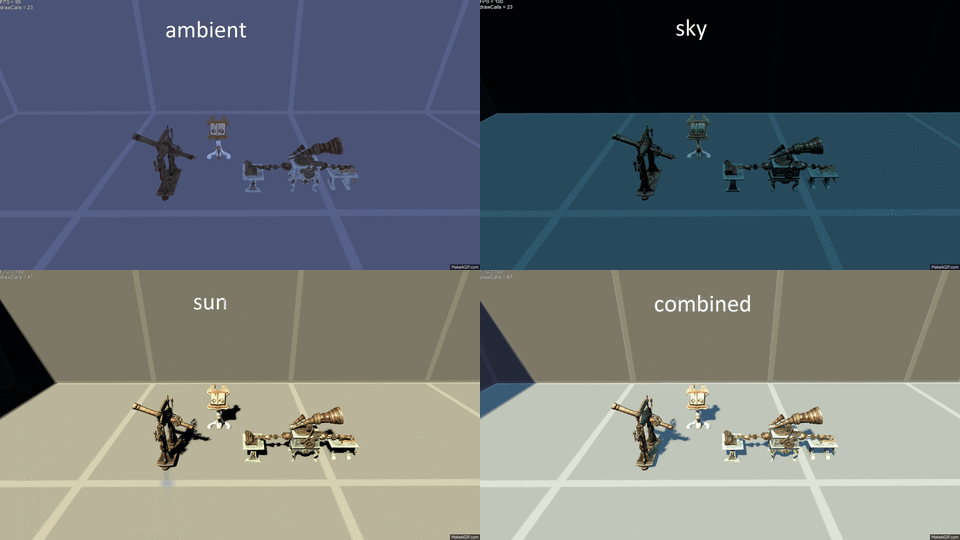
Ambient lights are used in Trine 3 (and in games in general) to emulate the real world phenomenon of radiative transfer (energy transfer in the form of electromagnetic radiation, e.g. light). After photons are emitted, they are scattered, absorbed and re-emitted multiple times before finally reaching the viewer. This is one of the reasons why in nature there are no completely sharp or black shadows and that it's hard to find a completely dark place during daytime.
AmbientLightEntity is most often used as a global ambient light to set the base tone of the scene. If both color components are identical, they will create the effect of a uniformly lit scene. AmbientLightEntity can also be used as a directional light of sorts, if the Color2 component is a darker shade than Color1 component, as it is by default. This still mimics the behaviour of radiative transfer (absorption, emission, scattering), since AmbientLightEntity can't create shadows.
DirectionalLightEntity
Directional lights are lights that emulate a light source that is infinitely wide and infinitely far, thus "emitting" light rays that are precisely parallel to each other. On Earth, direct sunlight can be approximated as parallel rays of light, and thus directional lights are used in Trine 3 to emulate sunlight and the sharp shadows caused by it. Another common use for directional lighting is a so-called skylight.
On an overcast day when no direct sunlight reaches the ground, objects are still clearly visible and lit. This is due to the light scattering from particles and water droplets in the atmosphere and reaching the ground through the clouds. The same phenomenon causes the sky to look blue during daylight and to be bright and colourful at all. If there was no atmosphere, there would be minimal scattering of light, resulting in a very dark sky and extremely harsh direct sunlight (among other, perhaps more lethal things), although the Sun would appear to be smaller in size. This is the physical phenomenon called "skylight", which is emulated in Trine 3 with a shadowless directional light that is perpendicular to the ground level, i.e. pointing straight down.
Although the effects of skylight and ambient light in the real world are based on the same physical principles (radiative transfer), in Trine 3 they aren't the same thing. Ambient light emulates the light that has already reached the ground and is just "bouncing back and forth" between different objects making everything look more or less the same from any viewing angle, whereas skylight is the diffuse light "coming straight down from the sky", making things look lighter and brighter from above rather than from below.
DirectionalLightEntity is a local directional light which uses an orthographic projection instead of a perspective one. It's local in the sense that it's borders (field of view and range) can be chosen at will so that the light is projected only to a certain area. Most often DirectionalLightEntity is used as a local skylight for the background objects or to create other local but large-scale lighting conditions, like the appearance of a setting sun, as it was used in the beginning of Pontius's tutorial level.
SunDirectionalLightEntity is a global type of DirectionalLightEntity. It's range and field of view don't have any effect on it like they do on local directional lights. Like other directional lights SunDirectionalLightEntity casts orthographic shadows, but unlike any other light in the editor (except for AmbientLightEntity) it's position doesn't determine "where the light is coming from". The direction of the light can be changed only by rotating the SunDirectionalLightEntity, because it's thought to be infinitely far away.
PointLightEntity
Point lights are considered to be minuscule points that radiate isotropic light i.e. light that's the same in all directions. In the real world, only stars other than the Sun are considered point sources of light due to the great distance separating them from Earth. The closest thing to a point light on Earth is a light bulb without a lampshade. Since light bulbs without shades are a quite rare thing to see, point lights aren't a very authentic way to light a scene. The good thing is, they can be used together with other sources of light to create more natural lighting conditions. Point lights are also a very good way to highlight something and to make even small details easy to spot.
PointLightEntity is Trine 3's basic point light. It's color, intensity and range can be chosen to match the desired situation, whether it's large-scale orange-white light coming from bubbling lava or just a tiny speck of light coming from a glowing pink mushroom. PointLightEntity can also be used to cast light on only alpha objects, that is, objects like fog which don't have a solid frame.
PointLightEntity doesn't cast shadows at all and thus its light isn't blocked by any collisions or models. Be sure to take this into account, when you set the intensity and range of your point lights. Speaking of which, range and intensity can be tweaked with the scale tool: When scaled from the middle of the scale tool's gizmo, both range and intensity are affected. When scaled on the green Y-axis, only intensity is affected, where as red x-axis affects range only. Blue line does nothing.
AmbientPointLightEntity
Ambient lights were discussed above and #AmbientLightEntity was said to be used as a global ambient light to set the tone of the scene. Like local directional lights, there are also local ambient lights. PointLightEntity can be used as a local ambient light by changing the property called AmbientFactor. When this is 0, the PointLightEntity works as a normal point light, but the closer it is to 1, the more it behaves like a local ambient light. This kind of local ambient light works in the same manner as global ambient lights, except it's range can be chosen at will.
PointLightEntity with RenderAlphaObjects
PointLightEntities can also be used to light alpha objects, like spiderwebs, fogs, clouds etc. In Trine 3 editor the RenderAlphaObjects property can be set to turn a PointLightEntity into an "AlphaBlendPointLightEntity".
It's noteworthy, that once RenderAlphaObjects is on, changing the Range property isn't anymore enough to change the actual range of the light, also the Radius property should be changed to the same value under PointLightComponent-->PointLightAreaComponent-->SphereAreaComponent->Radius. This only applies to manual editing of Range and Radius, if the scale tool is used to change the range of the point light, the radius is increased automatically.
SpotLightEntity
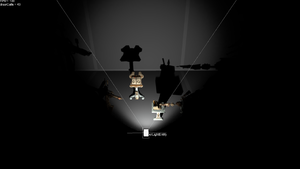
Spot lights are like directional lights but the light projection is different. The light is projected in a cone and the shadow projection is perspective instead of ortographic. A flashlight is an example of a spot light. Spotlights are usually used in combination with point lights to create more realistic lighting conditions.
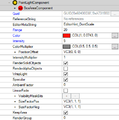
SpotLightEntity is the spot light of Trine 3. It shares many of the properties with DirectionalLightEntity (and SunDirectionalLightEntity), since DirectionalLightComponent is a child type of SpotLightComponent. A SpotLightEntity's range, color, intensity, fov and many other properties can be changed at will to reach the desired lighting conditions. SpotLightEntity has also a property called LinearFade. If it's false, the light attenuation of the spot light is more "natural" and fades faster. If set to true, the intensity of the spot light fades linearly, i.e. it's value decreases like 1.0/distance (instead of 1.0/distance squared).
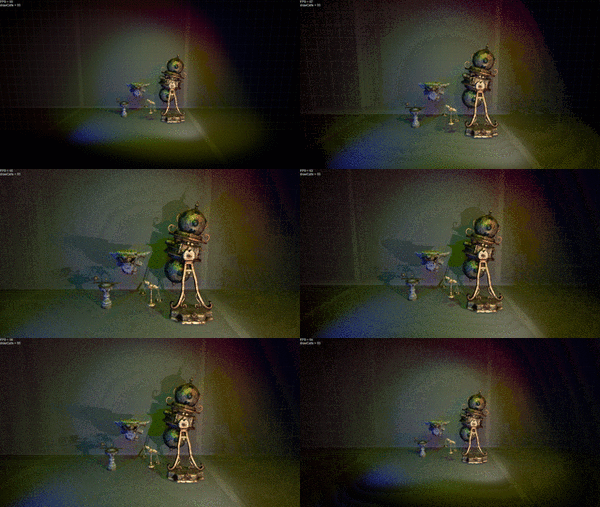
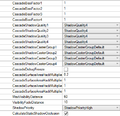
SpotLightEntities have ShadowQuality set by default to ShadowQuality4. If there are more than four SpotLightEntities with ShadowQuality4 in view, the shadows will start flickering. The same applies to SpotLightEntities with lower ShadowQuality so that
- 4 x ShadowQuality1 = 1 x ShadowQuality2
- 4 x ShadowQuality2 = 1 x ShadowQuality3 and
- 4 x ShadowQuality3 = 1 x ShadowQuality4
All in all there can be a maximum number of 10 shadow casting SpotLightEntities in view at the same time.
ColorEffectEntity
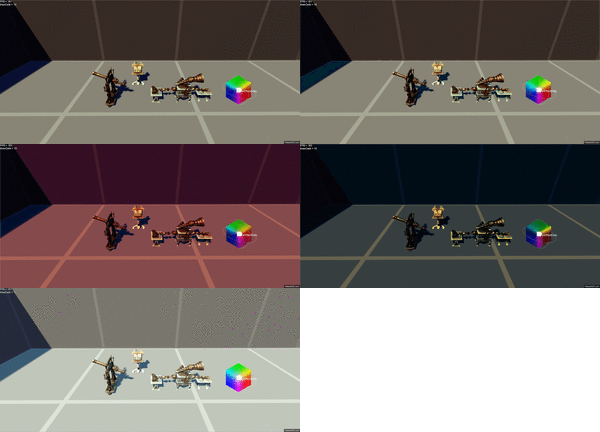
ColorEffectEntity is a scene wide effect that sets the tone of the scene. The Exposure property can be used to change the exposure of the whole scene, i.e. to make the scene globally darker or lighter. The ColorLookupTexture property can be used to choose a color look-up table from the ones created for the game in question. These can be found under \data\root\instance_base\entity\texture\color_lookup.
Bloom
General
Bloom is a shader effect used in game engines to emulate imaging artifacts of real-world cameras, like lens flare, finite dynamic range and airy discs caused by the diffraction of light.
In game engines, bloom effect can be used to create a dream-like visual style or emphasize a magically glowing objects. With the right settings it can also enhance the photorealism of the scene by emulating the above mentioned effects.
BloomEntity in the editor
BloomEntity (BE) can be found from "InstanceBase/Entity/SceneEntity/BloomEntity". BE is a global effect and it has many properties in it's GlowComponent, but most of these don't need to be touched by the user. The two most important ones are:
- Factor
- Determines the weight of the particular BE, if there are more than one in the scene. Mostly used for animation purposes.
- StreakLength
- Setting this to 0 removes the lens flare effect, which is dependant on the relative direction of the BE.
Properties of glowing objects
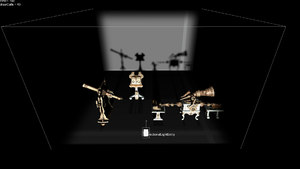
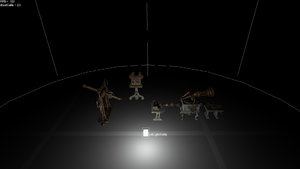
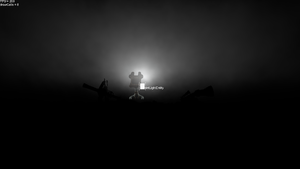
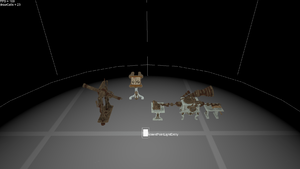
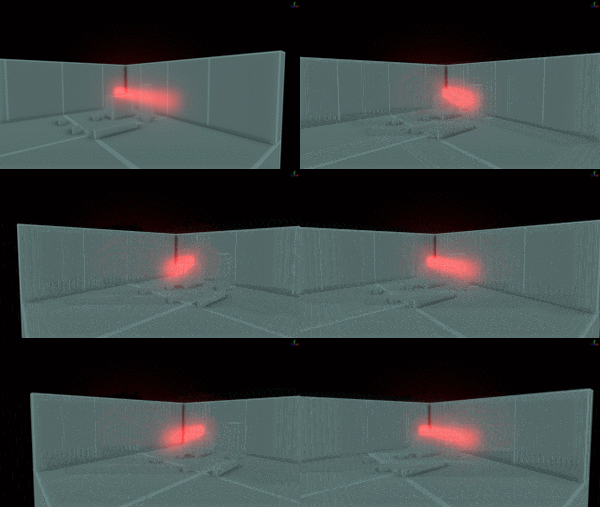
Normal entities can be made to glow, like the collisions used in the pictures. Every entity with a ModelComponent has four properties that determine their behaviour with BE. These are:
- SelfIllumination
- The colour of the self illumination. Like the name says, used for objects that are supposed to be self illuminated, like sun, moon and lamps.
- SelfIlluminationFactor
- The strength of the self illumination. Example values used for different entities are 1000 for sun, 2 for moon and 15 for a bright lamp.
- GlowAmountColor
- The colour of the glow effect. Like self illumination, but this adds a soft halo around the object.
- GlowAmount
- The strength of the glow effect. Values usually around or less than 1.
Usually self illumination and glow are used together to achieve the best result.
Additional Shadows
There are 3 kinds of shadows: fake_shadow_gradient.fbxmodel, fake_shadow_gradient_radial.fbxmofel and fake_shadow_solid.fbxmodel. The solid one is used to block lights by placing the black area to point towards light source (the other side is invisible). The other two are used to give walls etc some extra shading.
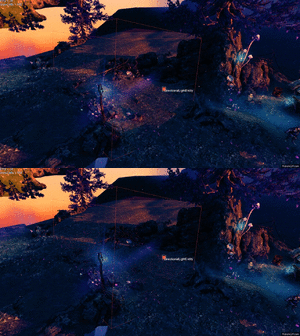
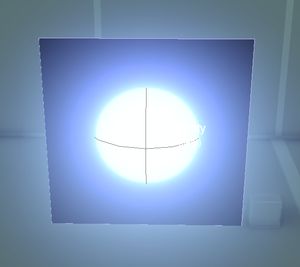
Some ground art pieces are kinda bumpy and there are times when they might look a little bit funny after lights have been added. This can be fixed by using ShadowBias that can be found on the object's properties and changing it to 0.1. Below will be examples and you can see how big the difference is.
Fog
Fogs can be found in Typeroot -> InstanceBase -> Entity -> ObjectEntity -> object -> atmosphere-> fog
CircleFogAreaEntity and SquareFogAreaEntity are used to create atmospheric effects and distance fog. It can be found in the type tree under LightEntity. FogAreaEntities work similiarly to DirectionalLights. Use Scale tool to edit Range, Fov and intensity. In Properties under SpotLightComponent you can adjust Color of the fog and thickness. Change Linear overbrightness to make the fog more or less thick. 1 is really thick and -1 is completely transparent.
