Mods
How to create a MOD
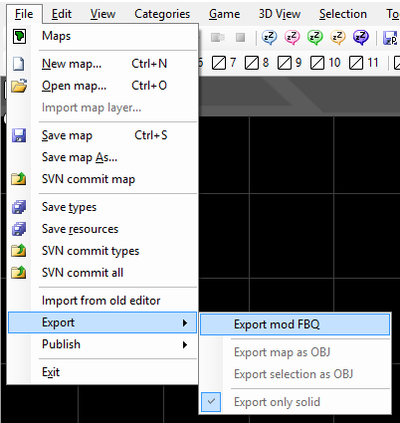
Now that you have made changes to a level it's time to create a mod file.
- Open Export mod FBQ window from File > Export > Export Mod FBQ
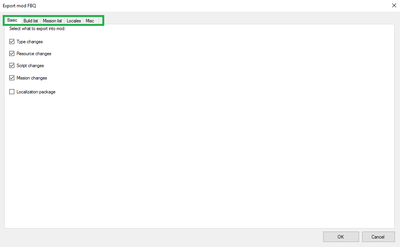
- From Build list tab select maps that you have modified and want to include into the mod package
- If you created your own level, make sure it was saved properly and into correct folder
- Select Mission List tab and modify it to your liking
- Add a new entry to the list by pressing New (only maps listed in this list can be selected in the mod)
- Enter "original" to the Campaign field
- Enter the name of the map to the Mission field (see Maps window for the names) (make sure you copy name exactly as it is)
- Check at all the field.
- Select Locales tab and edit the player names of the missions in the Translation area.
- Edit the values of modSaveIdentifier and modAchievementsEnabled in Misc tab
- Press OK when ready
- Give name to your mod file and save it
How to publish a MOD
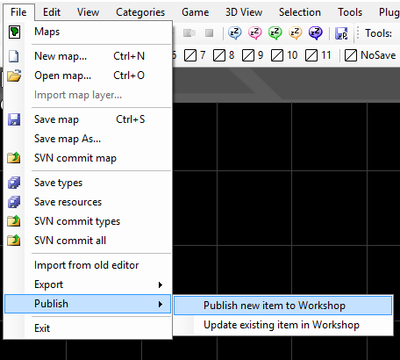
- Open Workshop publish window from File > Publish > Publish new item to workshop
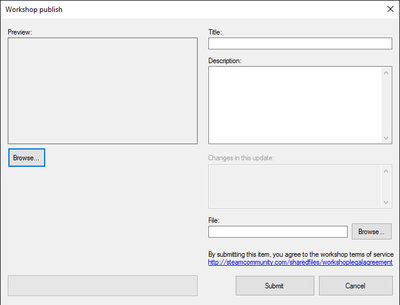
- Click Browse under Preview to add a preview image for mod
- Enter title and description
- Click Browse under File and select previously created mod file
- Submit
How to update existing MOD
- Open Workshop items menu from File > Publish > Update existing item in Workshop
- Select edit on mod you want to update
- Write a short description of the changes to "Changes in this update" field
- Click Browse under File and select the updated mod file and Submit
How to download other users MODs
- Navigate to Workshop
- In Steam go to Trine/Trine 2/Trine 3/Shadwen Community Hub and select Workshop tab
- Trine Workshop
- Trine 2 Workshop
- Shadwen Workshop
- Select a mod
- Subscribe
After this you can choose the mod from the game's launcher. More information about how this is done below.
Mods are saved to the location you chose to place your files, under the \custom area. Each mod has it's own separate numbered folder.
How to enable a MOD
- Subscribe to MOD using Steam Workshop (see: The section before this)
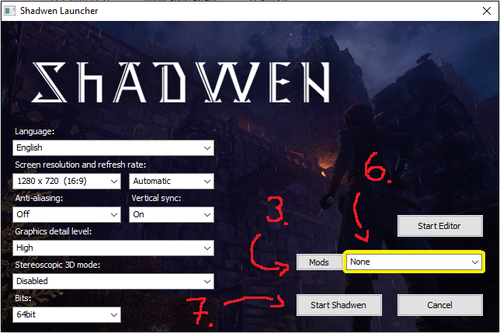
- Start Shadwen, Trine 2 or Trine via Steam (or directly using shadwen_launcher.exe, trine2_launcher.exe or trine1_launcher.exe)
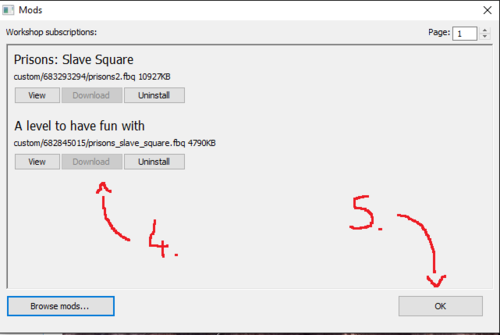
- Press Mods button to show list of subscribed mods
- Press Download on mods you want to be playable
- Press OK
- Select a mod from the drop down list next to Mods button
- Start Game
NOTE: The download buttons in the picture above are greyed out because the player has already downloaded these.
