Shadwen prefabs
Shadwen Editor Tutorial Main Page
-> Next tutorial (Level Art)
<- Previous tutorial (Items)
This section covers the basics of creating and using prefabs.
- Level path in Shadwen Public Editor: \data\mission\editor_tutorial\07_prefabs
Prefabs
Prefabs are sets of types that help you make usable content more quickly Their contents can vary from just a floor and a wall to entire buildings. They can easily be modified locally too if you want to make slight alterations to the prefab without changing the original prefab itself.
You can find prefabs in Categories -> Category root -> block_sets.
Parenting objects
It's very common to combine art and collisions so that when collision is moved so will the art. Parenting pretty much means connecting one object to another. The one object that holds the other ones is the parent. If you move the parent, everything connected to it moves too.
Master objects
Master objects work pretty much the same way as parenting does. When you create a prefab you have to drag the prefab icon if you want to move the whole prefab and that can get inconvenient when the icon is inside the prefab. If you make a collision in the prefab a master object you can move it instead of the icon. This can make working easier and faster. You can make your prefab's collision into a master object by right clicking the collision and choosing Prefab type - Set master object.
Creating prefabs
Here is the process of creating a simple prefab:
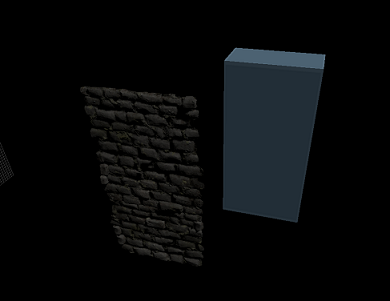
The example will be a wall piece so a rockcollisionhelper and some wall art is needed.
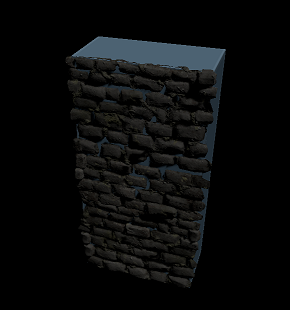
The art should be set slightly inside the collision for the best possible effect.
Parenting
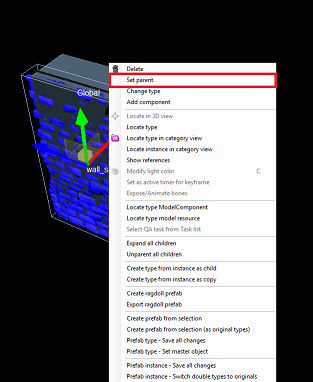
Next Parent the art into the collision. Right click on the art and choose set parent.
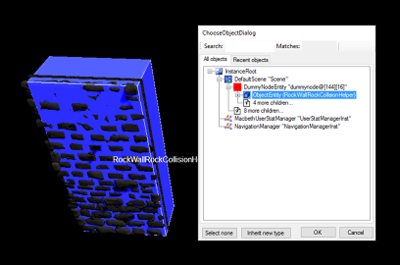
Choose the rockcollisionhelper and click ok.
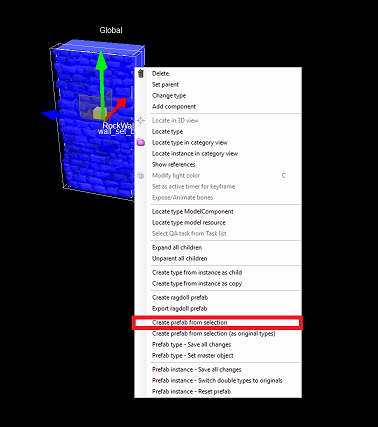
Choose both objects and right-click them. Then choose Create prefab from selection. Name your new prefab and you are done.
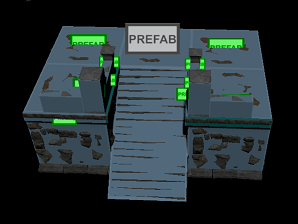
When a prefab consists of smaller prefabs the main icon will be the same color as always but the smaller ones will be green to make it easier to spot the main prefab.
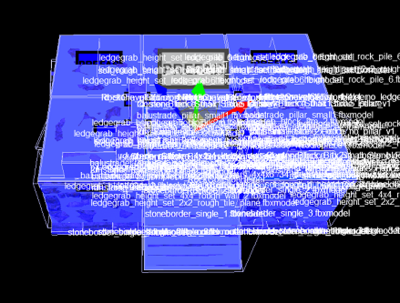
You can create a new prefab using an old one by just choosing everything else than the prefab icon and click Create prefab from selection. After naming it you can modify it and save it without having to worry about it destroying the original prefab.
Modification
Modifying prefabs is pretty easy. If you make changes to a prefab the icon will change color until you either save those changes or undo them. Be careful about making changes though as there are two types of changes: Local and global ones. Global ones affect all prefabs of the same origin while locals only affect that one prefab you made the changes to. For example if you have a wall that consists of multiple prefabs and you decide to change one in some way you should save it locally by right-clicking the prefab icon and choosing refab instance - Save all changes. This way the prefab you changed will be saved but the changes won't affect the other prefabs of the same name.
You can save all the local changes from all prefabs with the Check and save local changes to all prefabs button. You can find it next to the processing bubbles in editor. The icon is the same as the "save" one but it has a P on it. The icon next to this icon is Unparent all prefabs which can be used if you feel like you have no use for prefabs anymore.

Prefab icon colors
The prefab icon has four different colors. White prefab icon is the default one that indicates that everything works like it should. When a bigger prefabs consists of multiple prefabs the prefabs inside the main prefab are green in color. If an object is moved in a green prefab it's icon color will turn yellow indivating that something has been changed but the change has not been saved. And lastly the red icon indicates that something in the white prefab has been changed and not saved.
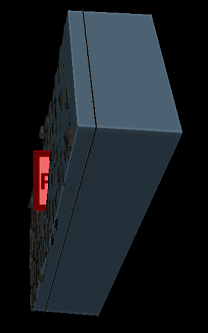
If a prefab is changed in any way (an object is moved, removed etc) its icon will turn red to indicate that something has been changed. You can get rid of it by either undoing the changes or saving them. If you decide to save them, right-click on the prefab icon and choose Prefab type - Save all changes.
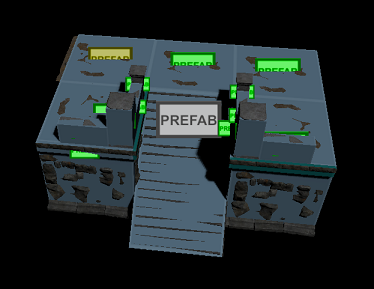
If the changes are made to a prefab inside a prefab the color of the small prefab will turn yellowish from its normal green color.
Useful tips
If you have accidentally moved parts of prefab in a way you don't like and haven't saved it yet you can reset the prefab. Right click on the prefab's icon and choose Prefab instance - Reset prefab.
If you delete a prefab from your map make sure to do it by deleting the prefab icon so that it deletes every object in the prefab.
Creating new types
If you make any changes to a type like coloring a wall a different color, you should make a new type so that if you use it in a prefab there won't be any unnecessary trash types. You can create a new type by right clicking the type you want to change in the type tree and clickin inherit new type . Check the components you want to use in the new type, click ok and then name your new type. After that you can make all the changes you want to it and the original type will remain the way it was.
If you are not sure if you have made changes to a type that you are going to use in a prefab you can always create a prefab with the Create prefab from selection (as original types) that is below Create prefab from selection to make sure you are making a prefab without trash types.
Shadwen Editor Tutorial Main Page
-> Next tutorial (Level Art)
<- Previous tutorial (Items)