Shadwen ai: Difference between revisions
Copied the article from the old wiki |
(No difference)
|
Revision as of 09:23, 15 June 2018
Shadwen Editor Tutorial Main Page
-> Next tutorial (Items)
<- Previous tutorial (Rope Targets)
This section covers the basics of using AI in your levels, from how hideouts work to how the guards patrolling works. Note that this is an advanced tutorial, which assumes the player already has some experience with the editor. If this feels too complicated, you can always skip this tutorial for now, and come back once you have a good grasp of the other tutorials.
Note that lot of the things covered in this tutorial (guards, Lily, hideouts, etc) are very Shadwen specific and won't be useful for those looking for information about the Trine editors.
- Level path in Shadwen Public Editor: data\mission\editor_tutorial\05_ai
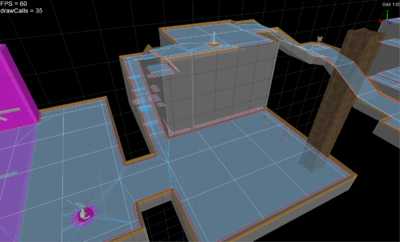
"Navigation Mesh is the area in which the AI can move.
You can see the Navigation Mesh by clicking the Visualize Navigation Mesh iconin the Toolbar."
If Navigation Mesh is not created, the AI won't work properly. Below video teaches how to create the Navigation Mesh.
Area Tool can be selected either via the hotkey 4 or by clicking the corresponding icon in the toolbar. The idea is to cover the entire level with the NavigationMeshAreaEntity. This allows the editor to create an accurate NavMesh for the whole level. If some parts are not inside the area created by the area tool, they will not be included into the NavMesh properly and might cause problems for the AI. Do note that the visuals for both the Area tool and Scale Specific Side tool are really similar, so be careful not to mix them up! Another thing to keep in mind is to never rotate the NavMesh, doing so will result in errors and the NavMesh not working properly.
"Dynamic objects such as boxes and barrels create holes to the Navigation Mesh so that the AI will go around them.
If you want the guards to not be able to move in a specific area, you can also use NavMeshCreatorCollisionHelper.
This is basically an invisible collision helper without collision, so its only purpose is to create a hole in the Navigation Mesh."
The above mentioned NavMeshCreatorCollisionHelper can be found from the type tree at: InstanceBase > Entity > ObjectEntity > object > Helper > CollisionHelper > RockCollisionHelper. It is a normal CollisionHelper that you just place in the level where you don't want the AI to be able to reach. You can also change its size and other properties.
Hiding Spots
"Lily needs some hiding spots to hide in.
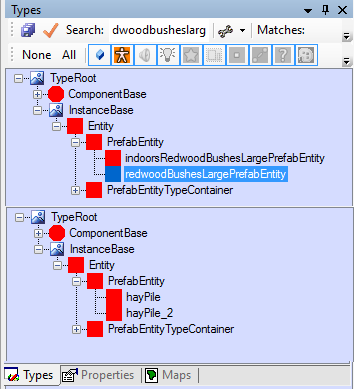
For this purpose you can use bushes like redwoodbushesLargePrefabEntity and indoorsredwoodbushesLargePrefabEntity or haypiles such as hayPile and hayPile_2.
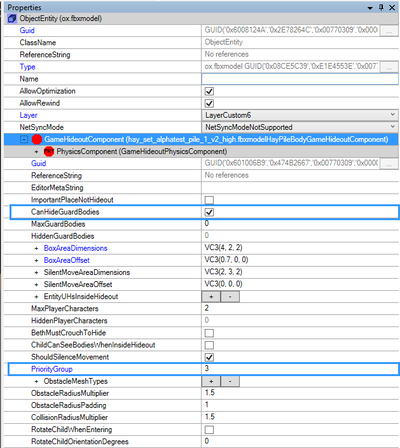
Go to the hiding spot's GameHideOutComponent and change the PriorityGroup setting to set the order of the hiding spot's for Lily to use.
The objects GameHideOutComponent is found in its Properties window.
Start from PriorityGroup 0. Here you can also change other setting concerning the hiding spot.
The hiding spots can also hide Shadwen and dead bodies.
The placement, size, and quantity of the hiding spots is one way to adjust the difficulty of your level."
"It's a good practice to number the PriorityGroups of the hiding spots 10, 20, 30 etc.
This way, if you later want to add more you can just number them 12, 21 etc."
The PriorityGroup of a hideout is a key factor in the decisions Lily makes. The highest active hideout is the one she will be attempting to go hide into. If that hideout is not accessible, she will go to the next highest one and so on.
"You can add a GameHideoutComponent such as GameHideoutComponent(hay_set_alphatest_pile_1_v2_high.fbxmodel) to just about any object if you really want to.
You may want to edit the position and size of the component from the object's Properties."
This component can be found in the type tree at: ComponentBase > AbstractGameplayComponent > GameHideoutComponent > BodyGameHideoutComponent > HayPileBodyGameHideoutComponent
Patrol
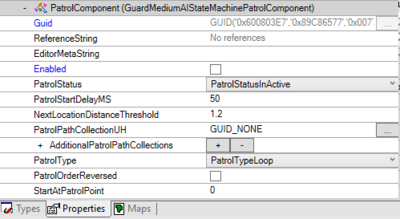
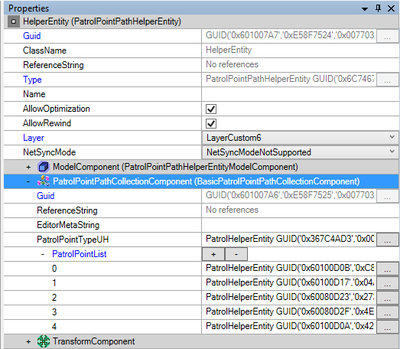
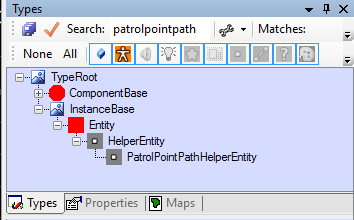
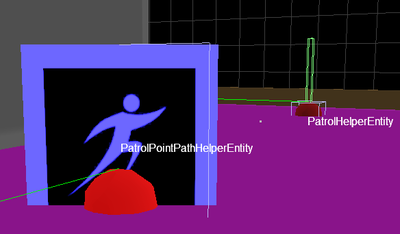
"Search the type tree for PatrolPointPathHelperEntity. Spawn PatrolHelperEntities from PatrolPointPathHelperEntity's Properties > PatrolPointList (click the +).
These PatrolHelperEntities are spawned right under the PatrolPointPathHelperEntity. Note that they are automatically placed on the AI layer. The PatrolHelperEntities are used to create a "path" for the guards to follow.
The order in which a guard will patrol these PatrolHelperEntities can be adjusted from the PatrolPointPahtHelperEntity under PatrolPointPathCollectionComponent > PatrolPointList. Unless you choose the PatrolType Random, then the order doesn't matter.
Go to the guard's PatrolComponent -> PatrolPathCollectionUH. Click on the "..." and then click on the PatrolPointPathHelperEntity to select the patrol path for the guard.
Here you can also change the guard's PatrolStatus and PatrolType among other things."
PatrolType:
PatrolType Loop: The guard goes through the PatrolHelperEntities in order. After reaching the last PatrolHelperEntity, it starts from the first one again. The guard continues to do this until it sees or hears something.
PatrolType Random: After the guard has reached a PatrolHelperEntity, it randomly chooses another PatrolHelperEntity from the PatrolPointHelperEntity's PatrolPointList.
PatrolType PingPong: After reaching the last PatrolHelperEntity in the PatrolPointList, the guard will turn around and go through the PatrolHelperEntities in reverse order."
SelectiveAIEnablingHelperEntity
"You can use SelectiveAIEnablingHelperEntity to choose which AI's you want to enable when Shadwen reaches the SelectiveAIEnablingHelperEntity's boxareacomponent."
AIMissionExitHelperEntity
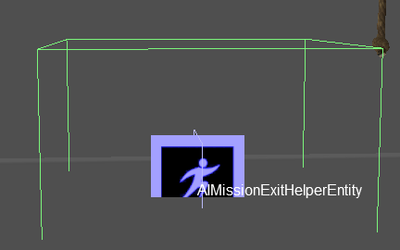
"A level should have at least one AIMissionExitHelperEntity
This is the place the AI will run towards after seeing a dead body and going to alert mode.
When the guards reach the exit, the game is over and you will have to rewind the time to continue.
The AIMissionExitHelperEntity should touch the ground.
You can choose which AIMissionExitHelperEntity a guard will use from AlertnessComponent -> AIMissionExitUH.
If you don't assign an AIMissionExitHelperEntity to a guard, he will automatically run towards the closes AIMissionExit."
In Shadwen, there are prefabs used to indicate where the guards will run to. These are alarm_bell_large and alarm_bell_wall, both found in the type tree from: IntanceBase -> Entity -> PrefabEntity. With these in the level, the guards have a proper and intuitive place where they will run to when they are alerted.
Gossip
You can place GossipHelperEntity to a level somewhere near guards that you want to gossip. Use the Area Tool (hotkey 4) to modify the area which Shadwen has to reach to activate the gossip. Go to the GossipHelperEntity's GossipCollectionComponent > Pool to add the GossipComponent(s) of your choice. Then, use the Actors setting to choose the guards. Change the Cooldown to choose how long it will take for the guards to start to gossip again (in milliseconds, making a value of 10000 equal to 10 seconds).
AI detection for moving dynamic objects
"The barrels and boxes already have the necessary components to be seen by guards and to produce sound.
However, by default, a dynamic object can't be seen or heard by guards.
To make the AI able to hear and see the movement of a dynamic object, it needs certain components."

The components an object needs in order for the guards to see and hear it are as follows:
- AreaComponent (with distractionObject bit in NotifyMask)
- PhysicsComponent (dynamic)
- DistractionObjectComponent
- GenerateSoundOnEventComponent
- SoundGeneratorComponent
By default the AI will try to ignore any sounds and movements these objects cause if they were moved by another guard.
More detailed information can be found here: AI detection for moving dynamic objects.
Shadwen Editor Tutorial Main Page
-> Next tutorial (Items)
<- Previous tutorial (Rope Targets)
