3D Asset Workflow: Blocksets
Revision as of 15:42, 28 July 2023 by Mio Mäkijärvi (talk | contribs)
- ◇ Main Steps
- 3D Asset Workflow: Concepting
- 3D Asset Workflow: Sculpting
- 3D Asset Workflow: Retopology
- 3D Asset Workflow: UV Mapping
- 3D Asset Workflow: Baking
- 3D Asset Workflow: Texturing
- 3D Asset Workflow: Asset Assembling
- 3D Asset Workflow: Naming the Asset
- 3D Asset Workflow: LODs
- 3D Asset Workflow: Exporting to Editor
- 3D Asset Workflow: Completed asset checklist
- ◇ Additional Steps
- 3D Asset Workflow: Alternative Textures
- 3D Asset Workflow: Billboards
- 3D Asset Workflow: Blocksets
- 3D Asset Workflow: Collisions
- 3D Asset Workflow: Sikailu
- 3D Asset Workflow: Sway
- 3D Asset Workflow: Tile Textures and Trimsheets
- 3D Asset Workflow: Tintmask
- 3D Asset Workflow: Vegetation
- ◇ General Tips and Troubleshooting
Summary
- 3D Asset Workflow: Asset Assembling
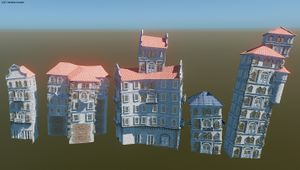
- Blocksets or modular sets are used for creating building exterior or interior environment assets (such as walls, pillars, doorways, windows, and balconies etc)
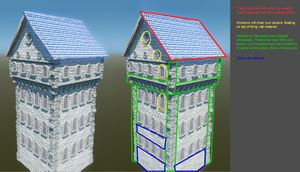
- Basic idea is to create big texture atlases and trim sheets, that have differently tiling parts and then only few unique parts for decorations
- Special attention must also be paid to the blocksets' optimization, since the sets will be used a lot in a level
- Modular building pieces are used to:
- Build large structures in 3D, with relatively small texture memory load
- Provide the level artists with the necessary, smaller building blocks to build the levels in the Editor
Testing the Modular Blockset in the Editor is Important
- 3D artists are highly recommended to use and test their own set in the Editor as early as possible
- You should try using the pieces to build a complete looking result, and evaluate how easily they can be used to make environment as shown in the level concept art
- Set that has not been used to build anything or tested before the final commit is sure to lose a lot of potential!
- If some asset combination seems especially good and usable in various situations, it can also be combined into a separate asset
- This eases both the work of level artists, and helps optimizing the game
Planning the Blockset
- Planning is the most important part of making a modular blockset
- Steps:
- Figure out how many different tiling textures you might need
- Think of how to break the tiling, with e.g. windows, doors, balconies, pillars, decorations et cetera
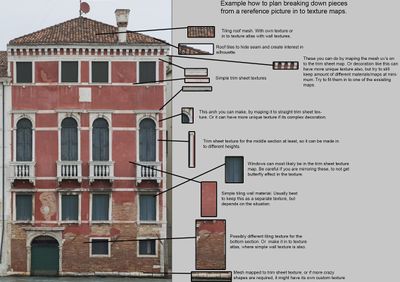
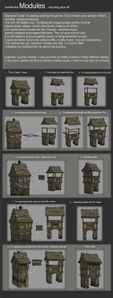
- Below is an image that shows you how you can start thinking about what you need from your texture maps, and how many you might need to create them for similar type of a building
- Usually you need:
- A few tiling base materials (these base materials can also be in one texture atlas)
- A trim sheet material
- Possibly a material for more unique decorations
What to Take Into Consideration
Style & Consistency
- The modular blockset will be the basis of a notable portion of a level, and while it defines the look, it must also play nicely with the rest of the assets and other blocksets used
- It is important to thoroughly research the level art concepts and mood boards to internalize the style you're aiming for
Size vs Time
- Important things to take into account:
- Most blocksets consists of a small (in comparison to the finished set) amount of unique models and materials, which are then mashed together in various ways to create larger and more varied assets
- The most obvious way to reduce time consumption is to figure out a balance between:
- The smallest possible amount of objects and materials you can create, and
- How varied/non-repetitive will the finished set look
- However, depending on the set, cutting down on the base asset creation might add time to the assembly phase
- It is better to use more time in the final assembly than with the base creation phase, as once the base assets are finished, you can commit the blockset in batches - allowing the level artists to utilize the already finished assets while you assemble the rest
Parts Needed
- Every blockset that is not restricted to just background-only or supportive usage generally has to have an answer to "how will this be used to block out the gameplay geometry?"
- E.g. how will an interior architecture set block out a 8x5x?m rectangle collider connected to the floor, that the player can climb and walk on top of. And how well the set handles deviating from these dimensions.
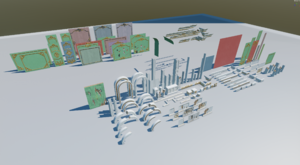
- Architectural sets should include enough generic "transition pieces" or "connection pieces"
- Typical examples include the border and trim pieces, but these can also be something like pillars for wall pieces
- The function of these is to attach architectural pieces together and hide possible seams, adding flexibility to the set
- Great sets include different horizontal and vertical pieces, corner pieces, and also maybe arch/curve pieces (if applicable to the set)
- Without connection pieces like these, the set pieces are very tough to fit together, let alone with other architectural sets, and their use will be more limited
- In organic sets, it's good to have a clear unique shape for each piece, that can also be attached to other pieces in the set, and have an uniform flow between them
- Each singular piece also benefits from having a varying shape/silhouette from different viewpoints
- Often a single well thought out piece that manages to look interesting and different in various angles, is better than many different looking pieces that do not
- Each singular piece also benefits from having a varying shape/silhouette from different viewpoints
- Should generally avoid pieces that attach to one another using only very strictly defined pieces
- For example open ended trims with no backfaces limit their use, requiring a very precise seam-to-seam attachment to other pieces, plus the likely use of extra assets to hide their seams and possible open ends
- Making them tile in increments of 0.25m, 0.5m, 1m, or 2m does help a little as editor's incremental move snap supports that, but it only works in 1:1 scale, and it's generally better to just put some simple garbage texture to fill the backfaces on such pieces.
- For example open ended trims with no backfaces limit their use, requiring a very precise seam-to-seam attachment to other pieces, plus the likely use of extra assets to hide their seams and possible open ends
- Try to make as many of the generic pieces to be usable from multiple angles as possible!
- For "extremely" modular sets, like pipes that are by definition meant to be chained together and require precise connection, it's useful to plan out the origin/anchor point placement for ease of use
- Line it up with the most likely rotatory or connection points, e.g. in a 90 degree curved pieces, the origin point should line up with both ends of the pipe and not the center of mass
- This helps building the pipe structures in the level as it's easier to replace straight pieces with curved ones and having them near instantly line up, and being able to further continue without fuss
- Line it up with the most likely rotatory or connection points, e.g. in a 90 degree curved pieces, the origin point should line up with both ends of the pipe and not the center of mass
Different Levels of Detail
- When thinking about what parts are needed for the blockset, it might help to think about them in different levels of detail
- E.g.:
- Large architectural shapes and building blocks
- Walls
- Walkways
- Roofs
- Bridges
- Stairs
- Medium details to break up monotony
- Windows
- Doors
- Railings
- Frames
- Pillars
- Supports
- Ornamental details and connecting pieces
- Decorations
- Ornamental borders
- Edge trims
- Emblems/sigils
- In addition, all of the parts will need variations of themselves, such as bends, corners, arches, broken versions, etc
- Also, the set has to include connecting pieces and seam-hiders, such as voluminous border or trim pieces to glue wall and floor pieces together
Modularity
- When making modular pieces, it's good to have specific measurements for height and widths
- This way the pieces fit together more easily
- For example, a wall section that is 10m wide needs to have a matching 10m wide trim section
- When pieces fit together like this, assembling them is easier with the Snap Tool in Modo
- Problem that comes with this though is that for Trine world, everything starts to look too straight, so to combat this make windows, pillars, and trims that hide seams a bit bent and twisted
- Another way is to assemble bigger sections (modules), or entire building and then twist and bend it at the end
- This way the pieces fit together more easily
- Things to keep in mind when designing assets for modularity
- How reusable the pieces are vs. how unique they are
- How quickly do the pieces become repetitive if used a lot
- How interesting they are
- Balancing these traits to make compelling set pieces
- Hiding seams
- Creating border meshes to create more natural corners or transition points between materials or UV seams
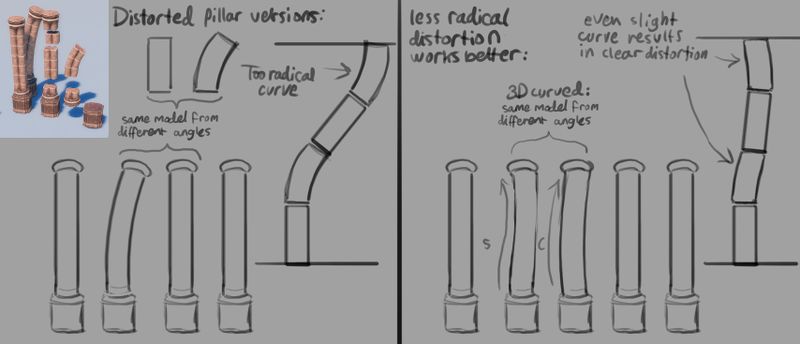
- An example of how to create distorted variation pieces
- A slight curving of pillar pieces already create enough distortion and can be used more naturally than more radically bent variations
- When creating this type of organic curving that is important for the Trine style keep in mind also the 3D aspect of the curving so don't just curve in 2D space. The pillar should be differently curved from every angle
- Most of the assembly happens in Modo
- Useful tools for building the pieces
- Noise falloff with move/rotate/scale tool can easily add unevenness to a boring flat surface
- Soft Drag makes adding subtle curves and Trine Wonkiness™ easy
- Bend tool under deformation is helpful for creating clean bends
- Feel free to bend the rules
- Working with limited tools in terms of available materials etc requires thinking outside of the box
- If it looks good, it looks good
- Previous rules such as texel density and non-uniform scaling can be stretched to make the end result work better
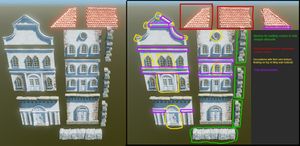
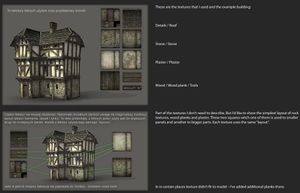
Texture usage in modular parts. Source: http://wiki.polycount.com/wiki/ModularMountAndBlade
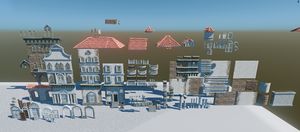
Different variation made with modular parts. Source: http://wiki.polycount.com/wiki/ModularMountAndBlade
Source: http://www.kevinjohnstone.com
Source: http://www.kevinjohnstone.com
Source: http://www.kevinjohnstone.com
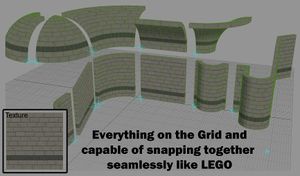
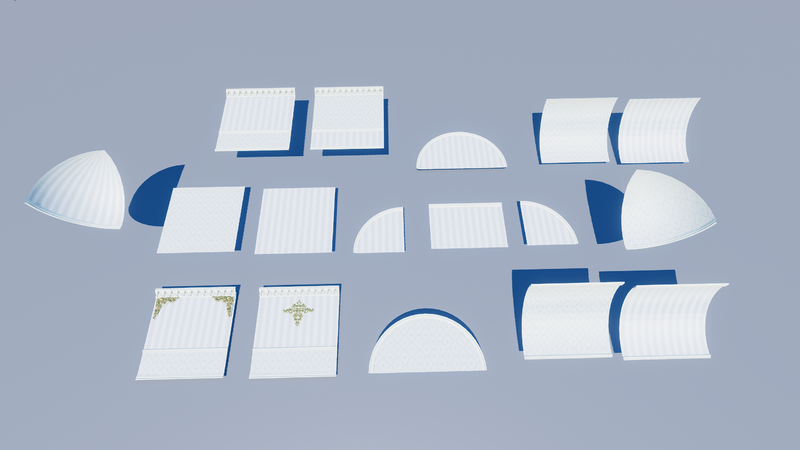
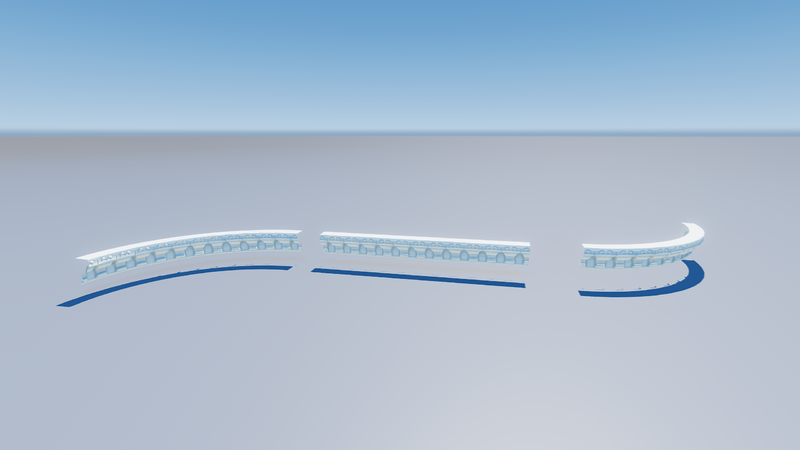
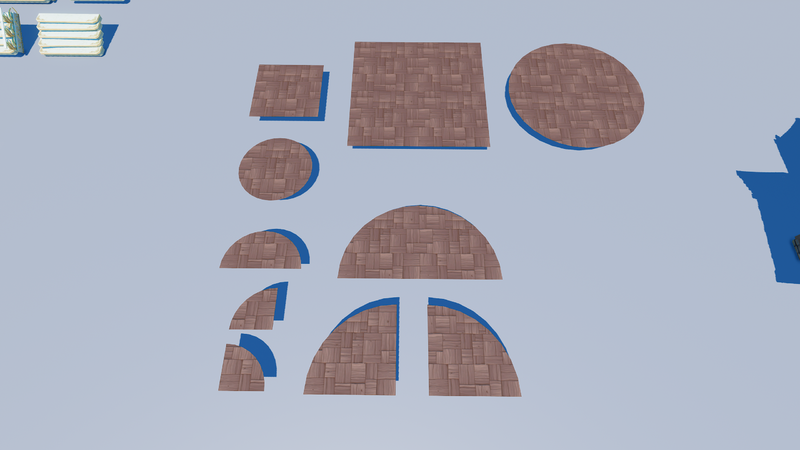
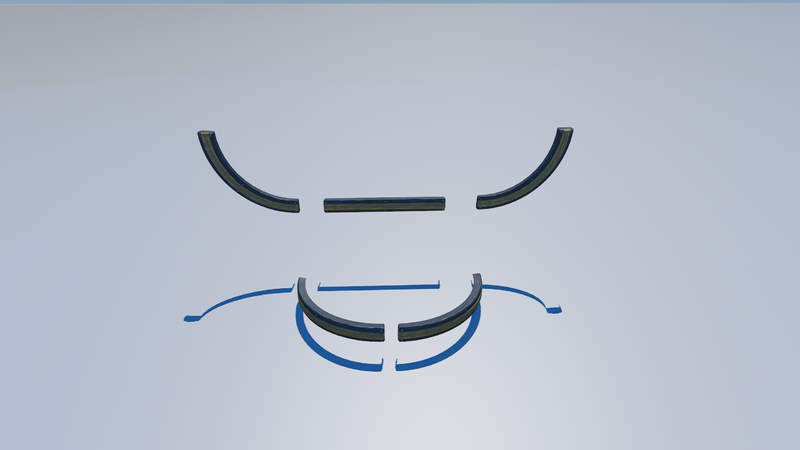
Typical Wall Pieces for Every Modular Building Set
- On top of the general rectangular pieces, these rounded variations come in handy when using the modular set
- Walls:
- Bended Inward - 90 degrees
- Bended Outward - 90 degrees
- Wall/Ceiling Moldings:
- Bended Inward - 90 degrees
- Bended Outward - 90 degrees
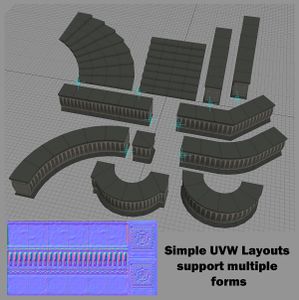
- Floors:
- Apart from the square ones we get normally:
- Half circle
- Half circle ( split in two )
- Full circle
- Beams ( including ones that are meant for ceilings ):
- Bended Inward - 90 degrees
- Bended Outward - 90 degrees
Materials
- 3D Asset Workflow: Tile Textures and Trimsheets
- Clever use of materials is important for optimizing both workflow and game performance
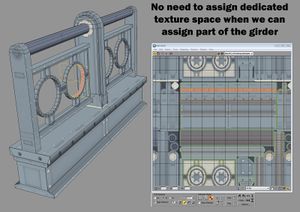
- Tiling materials allow the creation of very large meshes without blowing up the texture size, while trimsheets provide a toolkit for detail work, and breaking up the repetition
Tips&Tricks
Good example showing the power of well done trim sheet.
Trim sheet map used for the whole environment in the Tor Frick's video. Though for Trine editor we don't use this kind of channel mixing with trim sheets
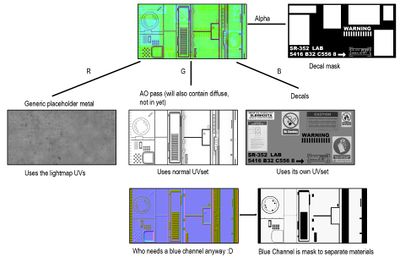
Source: http://torfrick.com/info/lab.html
