3D Asset Workflow: Decals and Alpha planes
- This site is a part of a series of 3D asset creating process related wiki sites 3D Asset Workflow
- For modeling you'll probably find a lot of useful general info on the Modo site
Contents
Using the Fur Material to implement alpha planes fast
- See Foundry.com : Working with Fur.
- See Foundry.com : Fur Material.
- See Foundry.com : Hair Tools Reference.
- Instead of inserting alpha planes to a model by hand in Modo, you could use Fur Material
- This gives you the opportunity to test different styles etc. without having to make everything from scratch when something needs to be changed
- It´s important to remember, that currently our editor does not support alpha blend properly (alpha blends can be used, but they need their own lighting etc), so it's better to use alphatest only
- This means that the alpha map can only be black and white; no grey areas
Decals
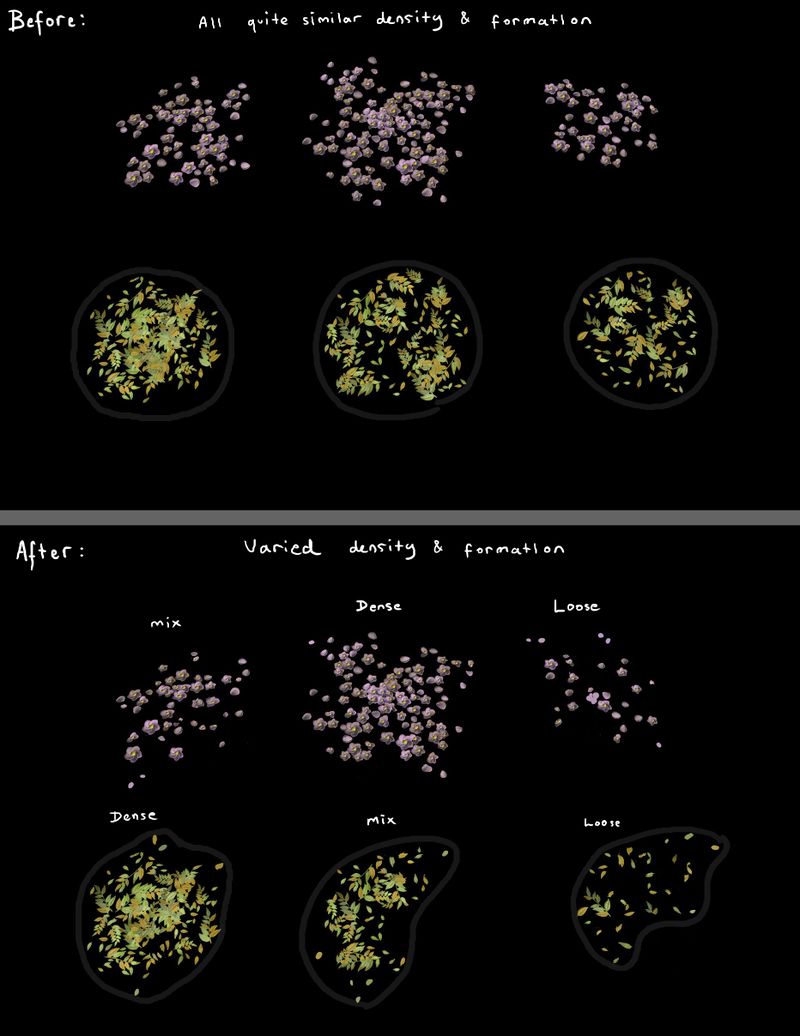
- Tips on how to create variation to ground decals
Foliage
The shape
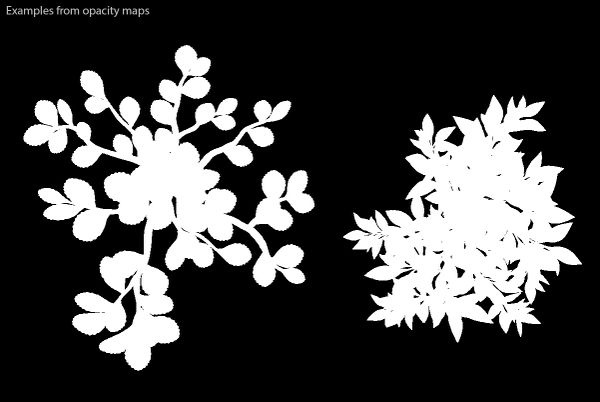
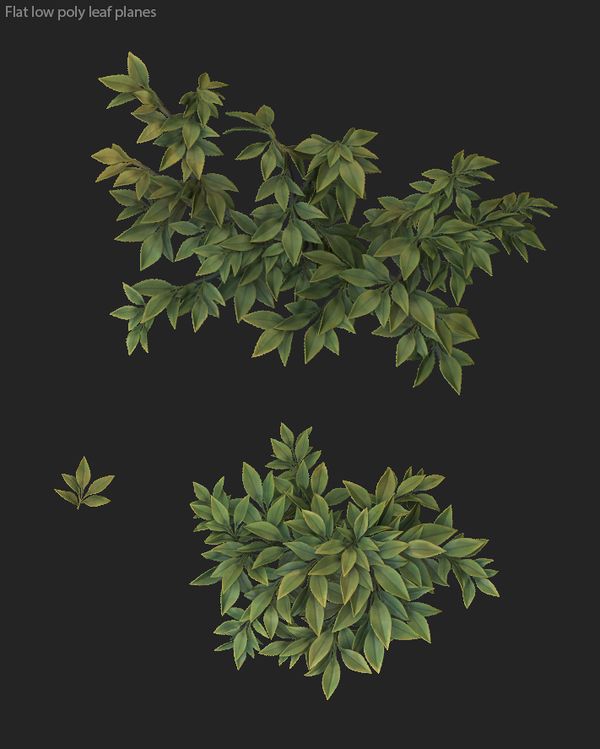
- When creating leaf planes for trees, the silhouette usually should have thicker mass in the center of the leaf mass and on the edges more distinct individual leaf shapes can be visible
- This way the more thicker center mass helps to block areas more quickly, while the edges create interesting shapes in the overall silhouette
- Below is an image showing alpha map from two leaf planes: silhouette of two leaf planes from transparency map:
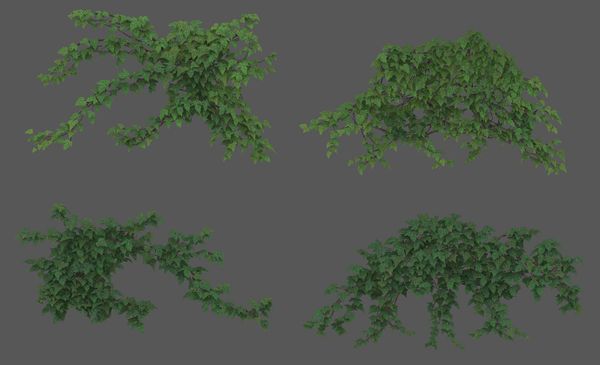
Also good example image by Tom Deerberg, that shows the same idea with wall covering ivy:
PHOTO:Sources
- A fast way to sculpt a leaf plane is by starting with a few different branches with sparsely laid out leaves on them
- Next start arranging these branches into different leaf planes, so that they form mostly a round shape. This sort of shape works well in many situations, when placing the leaves later on to the tree trunks
- Try to keep the leaf plane relatively flat in the sculpting phase. It is good to have height difference in the branches of the plane, but too much difference will make a bad looking normal map, that can cause weird shadowing.
- After placing the small leaf branches, add some leaves to the center where the branches meet, so that it has more volume.
- For the leaves you can already test some coloring with polypaint in Zbrush. You can bake out this coloring later if you want.
- xNormal for example has high poly vertex color bake option, map that comes out of it can be imported into Substance Painter and added to albedo color layer.
- For the low poly shape of a leaf plane, create a shape that approximates half sphere, this shape works in most angles well. Don't overdo this though, test what works best for the situation they are used in.
- Arrange these leaf planes in to the the bigger branches in such a way, that darker/bigger are lower and Lighter/smaller at the top
- Creating this height difference between the leaf planes helps to make the leaf mass have more volume
- Sometimes the height differences might be too much, or you might want to scale the leaf planes bigger/smaller
- Experiment with these and test in editor, to see what looks best. Quick way to experiment with by just changing leaf sizes, can be done in Modo by selecting leaf planes and using scaling in local model.
Colors & Values
- Leaf planes should have gradient in them, darker and more brighter leafs are needed for creating sense of volume in a tree branch.
- Darker leafs are placed lower in the branches and brightest at the top, just like light would hit them in nature.
- Example image below has this effect done in more exaggerated way to illustrate the point: values of different leaf planes
- It is probably good a idea to not just make leafs darker with black color, but for example mix a hint of some colder color to them. Same for the brighter leafs, don't just make them lighter with white color, but try to mix in warmer colors.
- Also in lower leaf planes you might want to make the center of the plane darker, this way it blends with the tree trunk branches better. Outer edges of the leaf planes can also have more stronger highlights, so the silhouette pops out more.
- Leafs should also have color variation! In substance painter there is a good material, that can help to achive this. Material is named: jk_color_variation (basically an image of some watercolor splashes that have different hues)
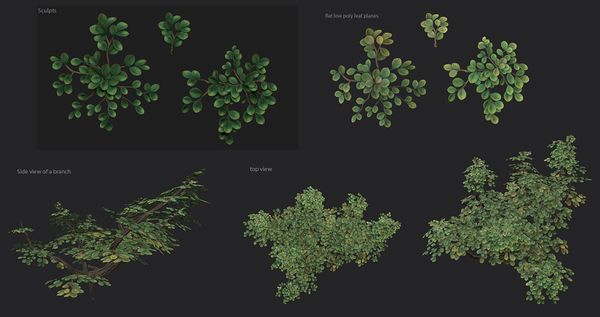
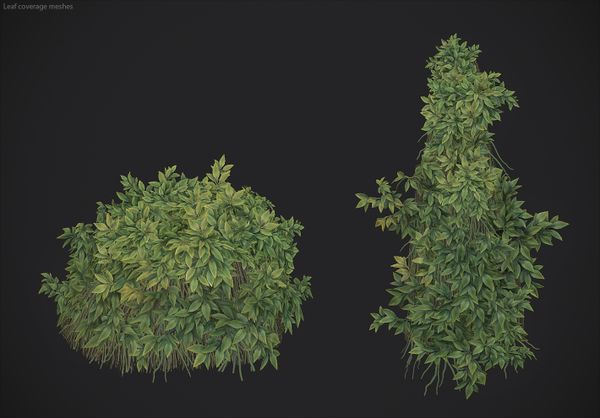
- Below are example images of leaf branches and their parts:
Image of parts of a leaf coverage model.
Leaf coverage models.
Depth and Vertex Normals
- More info about the vertex normals here: Modo:Vertex Normals
- Sometimes your leafs might look noisy in the editor, or you might notice this even before they are in editor.
- One reason could be that the normals have too much going on in the individual leaf shapes.
- Too much depth difference in the leafs especially can do this.
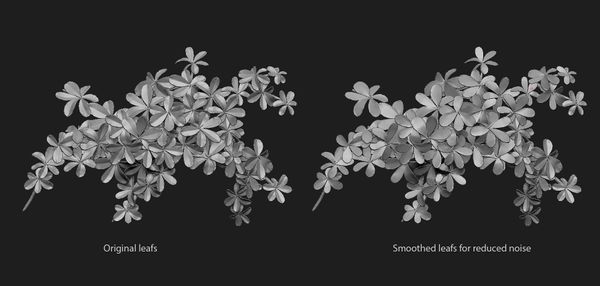
- You can try to tone down the effect, by quickly smoothing your high poly leafs and baking another normal map from them.
- Then in substance painter you can mix it with the original normal map and adjust how much the leafs get smoothed.
- This same thing can also happen if the high poly leaf plane has too much height differences in its small branches placement.
- Smoothed leafs example:
- Remember to add back faces to the leaf planes, so that in editor lights that are behind them cast shadows.
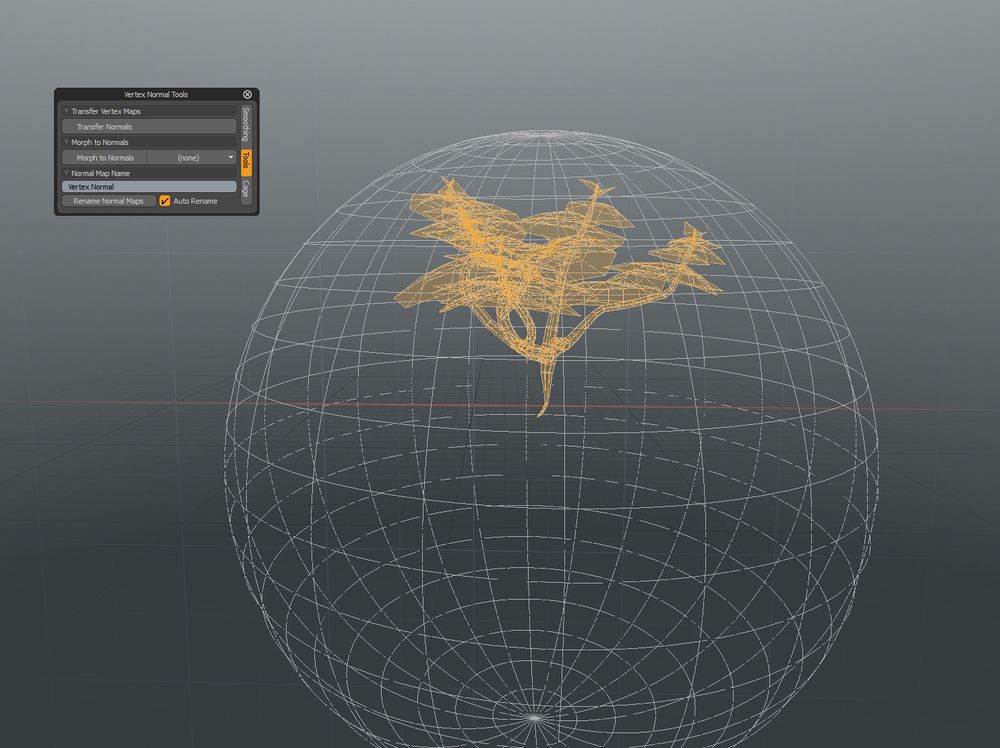
- For the overall leaf mass transfer vertex smoothing from a half a sphere, so that they look like one mass and not separate planes.
- Example gif image below shows this well:
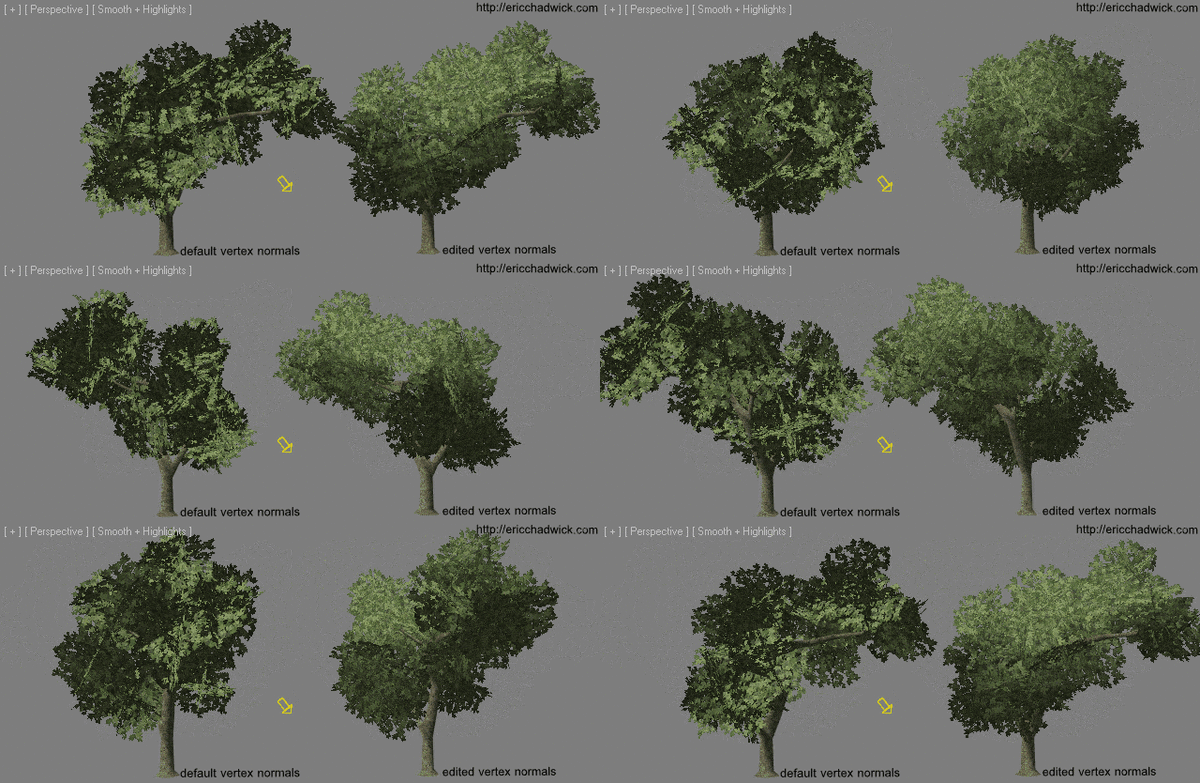
Eric Chadwick tree gif
PHOTO: Sources
- You can transfer vertex normals in modo with Vertex Normal Tools window. In it switch to Tools tab and use Transfer Normals. Make sure, that only the leaf mass and the half sphere are visible, before transferring normals. If you separate some of your meshes in to different layers for transferring normals, then remember to copy and paste them back together, don't use Modo's merge layers as that often seems to break the normals.
Sources
Video 01 : pixelfondue. [accessed June 7, 2018] MODO - Create Grass and Hair Alpha Maps. Available at: https://www.youtube.com/watch?v=E_QYtANycq4
Video 02 : pixelfondue. [accessed June 7, 2018] MODO - Using Fur to Create Polygon Strips Available at: https://www.youtube.com/watch?v=gfmJyg_qIg4
Img. 01 : Tom Deerbreg [accessed June 7, 2018] ArtStation - Tom Deerberg. Available at: https://www.artstation.com/tom_deerberg
Img. 02 : EricChadwick.com [accessed June 7, 2018] EricChadwick.com Available at: http://ericchadwick.com/img/tree_shading_examples.html/
