Hingejoints: Difference between revisions
Copied the article from the old wiki |
No edit summary |
||
| Line 36: | Line 36: | ||
- Find the HingeJoint entity you want to use in the Type Tree. There is one for rotating around each axis ('''XHingeJoint, YHingeJoint, ZHingeJoint''').<br> | - Find the HingeJoint entity you want to use in the Type Tree. There is one for rotating around each axis ('''XHingeJoint, YHingeJoint, ZHingeJoint''').<br> | ||
- Place the hinge joint in the position you want the object to rotate around.<br> | - Place the hinge joint in the position you want the object to rotate around.<br> | ||
- Open HingeJointComponent for the '''JointEntity'''. Press the [[File: | - Open HingeJointComponent for the '''JointEntity'''. Press the [[File:Dots.png|25px]] next to '''Component0''', and select the object you want the joint to attach to."</p> | ||
</blockquote> | </blockquote> | ||
| Line 44: | Line 44: | ||
*A Hinge Joint of your choosing | *A Hinge Joint of your choosing | ||
First you [[Static_objects#Collision_Helpers|place the wanted object to the level]]. Then you get the HingeJoint you want to use from the type tree at: '''InstanceBase -> Entity -> JointEntity -> HingeJoint.''' After both the object and the joint are in the level you need to assign them together. This is done from the HingeJoints properties. Under the HingeJointComponent there is a section named Component0, by default the value of it is GUID_NONE. Pressing the [[File: | First you [[Static_objects#Collision_Helpers|place the wanted object to the level]]. Then you get the HingeJoint you want to use from the type tree at: '''InstanceBase -> Entity -> JointEntity -> HingeJoint.''' After both the object and the joint are in the level you need to assign them together. This is done from the HingeJoints properties. Under the HingeJointComponent there is a section named Component0, by default the value of it is GUID_NONE. Pressing the [[File:Dots.png|25px]] button you can select which object to connect this joint to. After the connection is established you can start modifying the values the joint has such as the rotation angles and position locks. More about these in the section below. | ||
[[File:wheretheyreside.png|thumb|left|200px|HingeJoint's placement in the type tree]] | [[File:wheretheyreside.png|thumb|left|200px|HingeJoint's placement in the type tree]] | ||
| Line 99: | Line 99: | ||
A few chapters before we went through how to pin an object down to the level with one hinge joint. With one object we only used the Component0 property found in the HingeJointComponent. But the HingeJointComponent also has a '''Component1''' property inside it. | A few chapters before we went through how to pin an object down to the level with one hinge joint. With one object we only used the Component0 property found in the HingeJointComponent. But the HingeJointComponent also has a '''Component1''' property inside it. | ||
Connecting two objects together with a hinge joint works otherwise identical as connecting one object, we just add the Component1 into the mix. Component1 acts as the base in this connection, kind of like the level itself acted as the base in single object joint, while Component0 is the thing that connects to Component1. You add in the object to the joint the same way as before: Hit the [[File: | Connecting two objects together with a hinge joint works otherwise identical as connecting one object, we just add the Component1 into the mix. Component1 acts as the base in this connection, kind of like the level itself acted as the base in single object joint, while Component0 is the thing that connects to Component1. You add in the object to the joint the same way as before: Hit the [[File:Dots.png|25px]] button on the right side and then select the wanted object. Do this for both the Component0 and Component1. And now you have the two objects connected by an invisible chain. Note that the objects do not need to touch each other physically for this to work. Also if you have placed the object to float in the air, this double joint does not keep them afloat if you leave Gravity to be Enabled in the PhysicsComponent of the objects! | ||
In the example picture below the gray block on the left is connected to the green block on the right. | In the example picture below the gray block on the left is connected to the green block on the right. | ||
Latest revision as of 12:05, 18 June 2018
Shadwen Editor Tutorial Main Page
-> Next tutorial (Triggers and Property Connections)
<- Previous tutorial (Level Art Basics)
This section covers the basics of HingeJoints, how they work, how to use them and a few tips and tricks regarding them.
- Level path in Shadwen Public Editor: \data\mission\editor_tutorial\09_hingejoints
More detailed information can be found at JointEntity
Single Joints
HingeJoint Basics
"Dynamic objects themselves are just the basic building blocks for physics contraptions, however. In order to make something more interesting than boxes you can bump into, you'll need to build something out of them.
For this end, the most common, and most important tool to learn is HINGEJOINTS."
"HingeJoints attach a dynamic object from one point either to the game world or another dynamic object.
The object is still free to move otherwise; but one of it's points is always connected in place, making a hinge."
HingeJoint for one object can be imagined as a nail that nails the wanted object into the level. Thus the object is not affected by gravity so you can hold dynamic objects in the air with HingeJoints. This nailing process still allows the object to rotate around the joint. Rotations in all the 3 axis' can be set as possible or not, as can normal movement too. HingeJoints only work with Dynamic Objects, this is vital to remember as you go through this tutorial.
Attaching HingeJoints to Objects
"To attach a HingeJoint into a dynamic object:
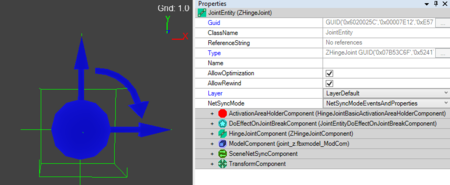
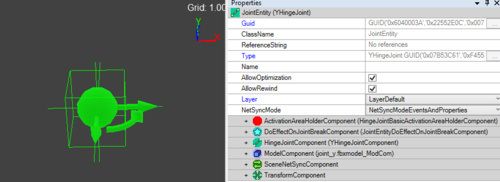
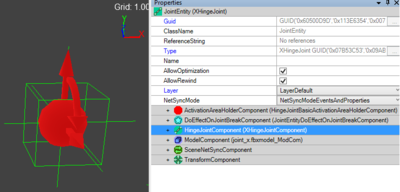
- Find the HingeJoint entity you want to use in the Type Tree. There is one for rotating around each axis (XHingeJoint, YHingeJoint, ZHingeJoint).
- Place the hinge joint in the position you want the object to rotate around.
- Open HingeJointComponent for the JointEntity. Press thenext to Component0, and select the object you want the joint to attach to."
For starters you need two things to make use of Hinges:
- A Dynamic object you want to rotate
- A Hinge Joint of your choosing
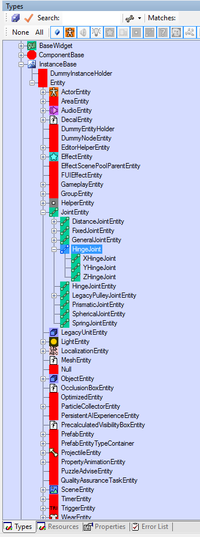
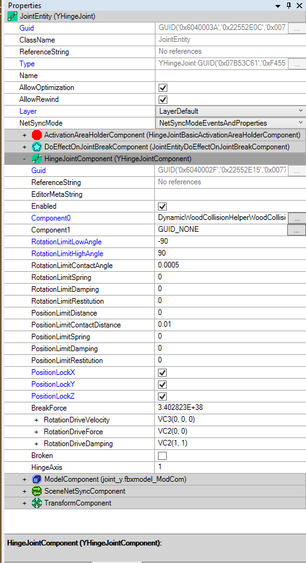
First you place the wanted object to the level. Then you get the HingeJoint you want to use from the type tree at: InstanceBase -> Entity -> JointEntity -> HingeJoint. After both the object and the joint are in the level you need to assign them together. This is done from the HingeJoints properties. Under the HingeJointComponent there is a section named Component0, by default the value of it is GUID_NONE. Pressing the ![]() button you can select which object to connect this joint to. After the connection is established you can start modifying the values the joint has such as the rotation angles and position locks. More about these in the section below.
button you can select which object to connect this joint to. After the connection is established you can start modifying the values the joint has such as the rotation angles and position locks. More about these in the section below.
HingeJoint Properties
"The HingeJointComponent has plenty of properties you might want to edit.
For example, you can set objects to only stop turning once they hit the ground. You can also force the object to stop when it reaches a certain angle.
Lets say you set RotationLimitLowAngle to 0 and RotationLimitHighAngle set to 60 for an object.
This means it won't turn backwards at all from its initial position; and in the other direction, it won't turn for more than 60 degrees.
Limiting how much a hinge joint is allowed to turn is often extremely useful."
The multitude of values, aspects and whatnot have all been explained in detail in the JointEntity page.
Multiple Joints
"Thus far we've talked about attaching a HingeJoint to a single object. It is also possible to attach a HingeJoint to two separate objects.
With two objects assigned to a hinge joint, it will not lock anything into the game coordinates. Instead it will lock the two dynamic objects together.
The HingeJoint will move together with the objects, but keeps them connected around it all the time.
To give a HingeJoint a second object to connect to, simply select a JointEntity: Component1 in addition to JointEntity: Component0.
When assigning two objects to a hinge joint, Component0 is the object that is attached to the Component1 object."
If a HingeJoint that is tied to one object can be visualized as a nail that nails the object to the level, a hinge joint that connects two objects together is like a variable length chain between the objects. This chain can make the objects function together, allow or deny rotation etc. An important aspect to realize is that the objects do not need to actually physically touch each other in the level. With two objects the hinge joint does not tie either of the objects into the specific point in level. Thus, for example, if you leave two platforms in the air and enable gravity, they will fall down. It is usually good to use these double hinge joints in combination with an object that is tied to the level with one hinge joint.
Training Wheels
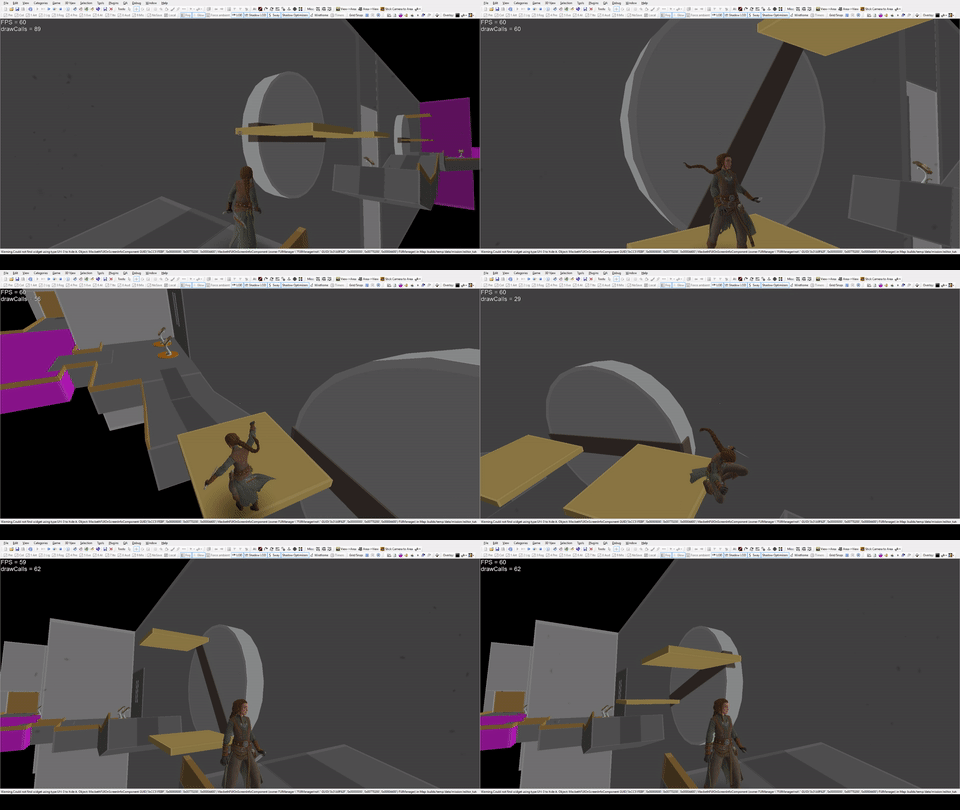
"In the picture on your right you have a wooden contraption, the platforms have had their properties modified, to make the whole thing function as needed.
Under PhysicsComponent, the RotationX/Y/Z Enabled properties have all been switched to False.
This ensures that the platform will never rotate in any direction: it will rotate around its HingeJoint, but always remain upright, so it's nice and easy for the player to jump on.
It's always good practice to disable all the unnecessary position and rotation axis from any object. This also eliminates all kinds of fidgeting and tilting in unwanted directions."
A good thing to remember with Shadwen when thinking about moving wheels such as this is the ability to alter the flow of time. Checking the surrounding while time stands still or rewinding time gives more tools for you to use while making levels. It is a good idea to experiment how the added mobility from the moving platform changes the way Shadwen does things, such as jump height and distance. Here you can test around with the differences of single joint vs multiple joint hinges in-game. We will be talking about the editor side of things further down on this tutorial.
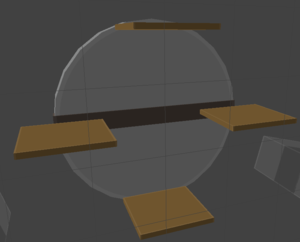
"Note that the HingeJoints don't actually need to be physically connected to the objects they connect to.
This wheel is built exactly the same as the previous one, it just has more platforms. The two extra platforms are connected to the middle block, just like before - even though the objects never touch, thanks to the join connection, the platforms move when the middle block moves"
While the hinge joint doesn't need to be physically touching to the object they connect to, the placement is still important when you want to rotate the object. The placement of the joint decides what place functions as the pivot for the object to rotate around. So if the HingeJoint is, for example in the middle of a square it the square will spin in place, while if the HingeJoint is not touching the square, the square will rotate with the HingeJoint as the center.
Component0 & Component1

A few chapters before we went through how to pin an object down to the level with one hinge joint. With one object we only used the Component0 property found in the HingeJointComponent. But the HingeJointComponent also has a Component1 property inside it.
Connecting two objects together with a hinge joint works otherwise identical as connecting one object, we just add the Component1 into the mix. Component1 acts as the base in this connection, kind of like the level itself acted as the base in single object joint, while Component0 is the thing that connects to Component1. You add in the object to the joint the same way as before: Hit the ![]() button on the right side and then select the wanted object. Do this for both the Component0 and Component1. And now you have the two objects connected by an invisible chain. Note that the objects do not need to touch each other physically for this to work. Also if you have placed the object to float in the air, this double joint does not keep them afloat if you leave Gravity to be Enabled in the PhysicsComponent of the objects!
button on the right side and then select the wanted object. Do this for both the Component0 and Component1. And now you have the two objects connected by an invisible chain. Note that the objects do not need to touch each other physically for this to work. Also if you have placed the object to float in the air, this double joint does not keep them afloat if you leave Gravity to be Enabled in the PhysicsComponent of the objects!
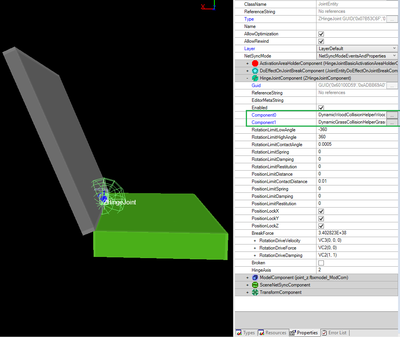
In the example picture below the gray block on the left is connected to the green block on the right.
Mass
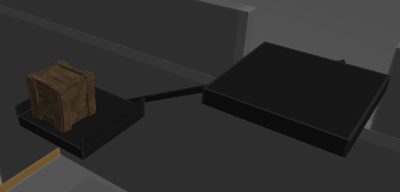
"The following creation utilizes both object mass and HingeJoints.
Both of the platforms have been given different masses, in order to control which one will be lower than the other at the start of the level.
The right side is heavier than the left by default, but the box placed on the left platform makes the left side heavier.
If you look at the left-side platform you will see that it has fences on the sides. These need to be dynamic objects, just like the platform, in order to move with physics in the gamefield.
To attach the fences to their platform, we use HingeJoints, with both RotationLimitAngles set to 0.
With this setup, the dynamic objects always move together and are effectively tied together; but the´HingeJoint will not allow them to move in relation to each other."
When you add things like fences to platforms it is good to check the weights of said fences. If the mass difference of two platforms is really small, these extra fences might tip the scales if you're not careful. The same thing can be said about Shadwen. If you want to make puzzles such as the one ahead you might want to make the differences in mass big enough that Shadwen won't affect them if you don't want that. It would be annoying for example if a platform that is supposed to stay up when Shadwen is on it instead started to go down because some small fault in the object masses.
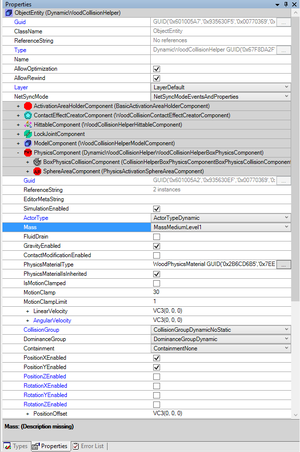
Mass can be found in the Properties page, under PhysicsComponent.
Here is a quick list on what the name of the mass corresponds to: numericMass is the numeric mass of the level, ie how much it weights.
| Name | numericMass |
|---|---|
| MassVeryLightLevel1 | 0.25 |
| MassVeryLightLevel2 | 0.5 |
| MassVeryLightLevel3 | 1.0 |
| MassLightLevel1 | 1.5 |
| MassLightLevel2 | 2.0 |
| MassLightLevel3 | 2.5 |
| MassMediumLevel1 | 3.0 |
| MassMediumLevel2 | 4.0 |
| MassMediumLevel3 | 5.0 |
| MassHeavyLevel1 | 6.0 |
| MassHeavyLevel2 | 7.0 |
| MassHeavyLevel3 | 8.0 |
| MassMassiveLevel1 | 10.0 |
| MassMassiveLevel2 | 15.0 |
| MassMassiveLevel3 | 20.0 |
Some different ways to use HingeJoints
"There's also a lot of additional things you can do by changing some of the HingeJointComponents properties.
Hinge joints may not be parallel to any axis - even though the premade HingeJointEntities would be named after the X, Y and Z axis, they can be rotated to suit any orientation, just like any other object."
Using HingeJoints as springs
"Setting a RotationLimitSpring makes the joint give way when rotated, but then making it forcibly to come back to its original position - like a spring.
When a Dynamic Object, launched by the springs, moves fast, it interacts with other objects just like always - for example, it can break a BreakableObject!"
RotationLimitSpring determines the stiffness of the spring for the soft limit, i.e. how strongly the object bounces back when it reaches the RotationLimitAngle. So in a nutshell, the smaller the number, the slower the joint returns to its original position. It also affects the range of the movement slightly.
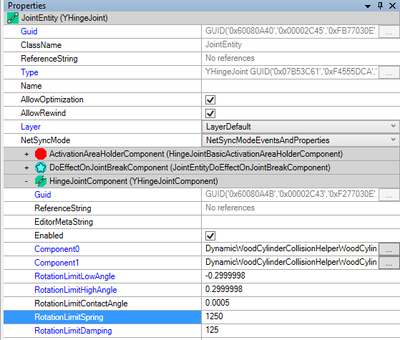
Rotating platforms
"HingeJoints can have RotationDriveVelocity and RotationDriveForce assigned to them. This makes their HingeJoint automatically rotate, like an engine. The wheels here in themselves are built in a very similar fashion to the ones in the beginning of this level. This time, though, the platforms have no RotationLocks, so there's no reason for them to stay always upright."
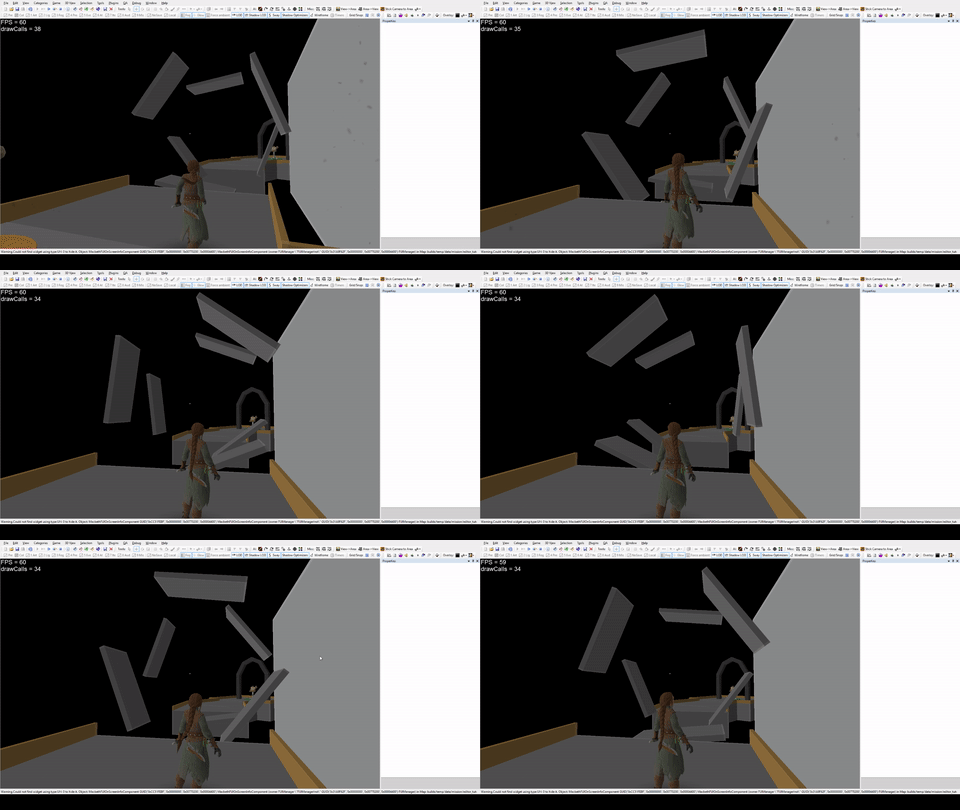
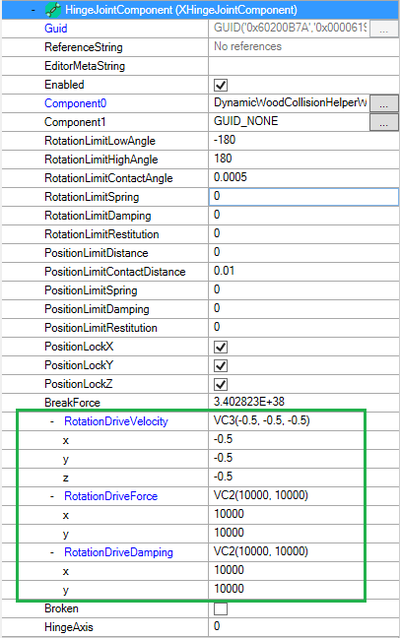
Until now we have made objects rotate around their HingeJoint when you or gravity applies force into the object. In this section we will be looking at ways to make the objects rotate around on their own. All the same rules and requirements that HingeJoints have had thus far still apply of course. The new thing we will bring to the mix is RotationDrive. RotationDrive has three difererent properties:
- Velocity: This controls the speed of the rotation. Positive numbers turn it to the default direction of the hinge, negative ones to the opposite. The higher the number, the faster the velocity

- Force: Maximum target force the drive is allowed to reach

- Damping: Determines how fast the maximum target force is reached

Velocity is the only property that has all of the axis' as editable values, force and damping only have X and Y as changeable.
Messing around with these values you can affect the way your object moves. If you want faster movement, up the velocity. If the Force is too low the drive might not be able to reach high velocity.
More specific information about these properties can be found from HingeJoint-Page
Experimenting with these values is highly recommended to get a better touch and understanding of them!
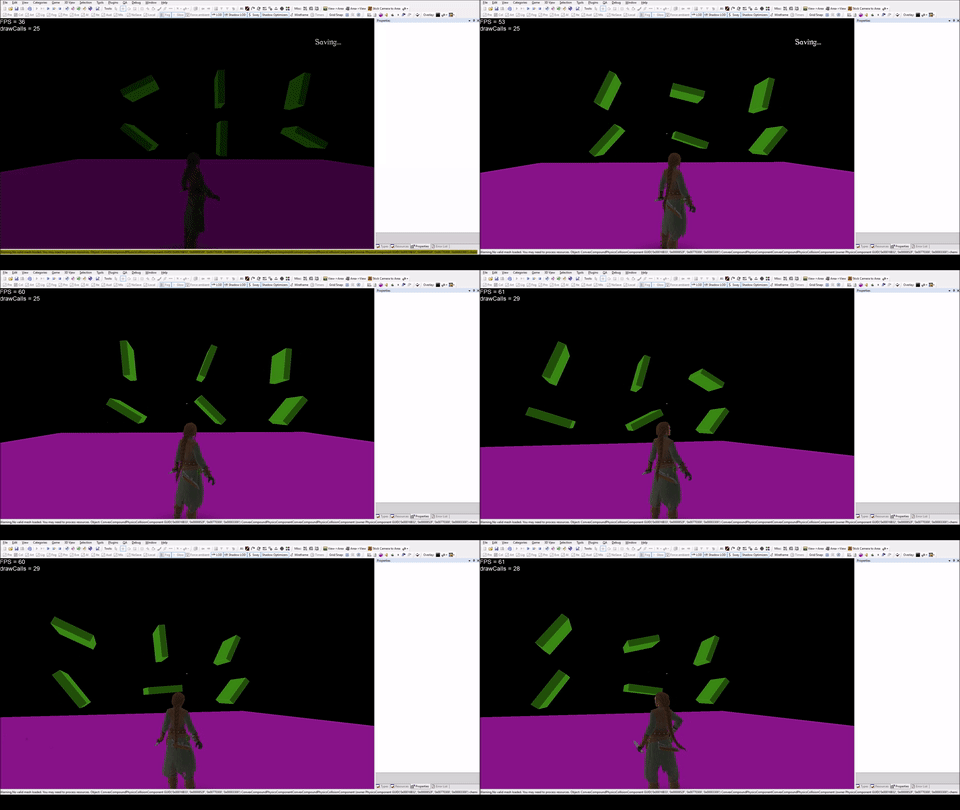
Visibility and Collisions
The rotating platforms at the very end might look like they are not connected to each other at all in the game view. If you check the contraption in editor mode it will look different. All the 3 rotating platforms are tied to an invisible block that is in the middle of the wheel. The middle block can be seen, selected and altered if you are in the Prefab Layer, the platforms themselves are in the there too so remember to look into both of them!
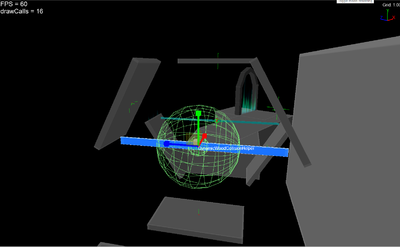
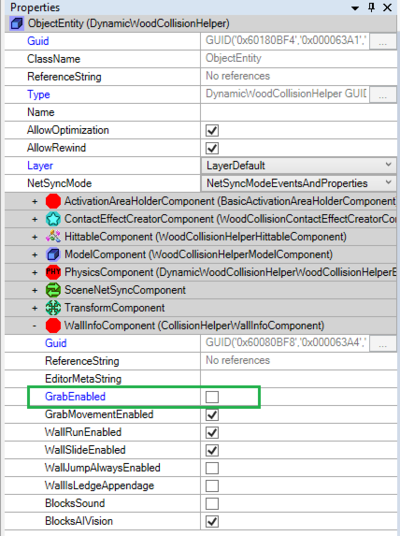
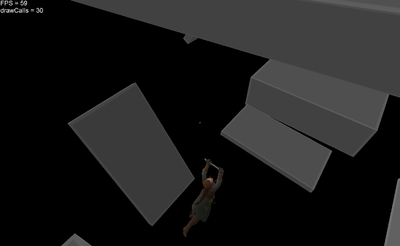
One important thing to realize with objects that are set not to be VisibleInGame is that they can still be interacted with if no other modifications are done! For example in the first set of wheels, the invisible centerpiece can be grabbed with a precise enough jump. This is never a good thing for gameplay purposes, getting interrupted by a invisible thing is never nice. Since these center pieces are positioned quite high and are made to be really thin you really won't hit the block, but it is just at the height that you can grab the ledge of it. An easy way to fix this is to disable the ability to grab the ledge of the object. If you open up the properties window of the selected center piece(Ctrl+P) you should see a WallInfoComponent inside. Open it up and inside there should be a property called GrabEnabled. This property decides whether or not you can grab the edge of said object. If the box is checked it means GrabEnabled is TRUE and you can grab it, if it is unchecked it is FALSE and you cannot grab it. Therefore we want to set the first value to be false for the first one. Remember to do this to the DynamicWoodCollisionHelper.
