To save UV space, you can mirror some of the UVs - however, try to avoid the butterfly effect, which can be visible in the middle if everything is mirrored
You can e.g. mirror both sides, but leave a strip of unique geometry/UV island in the middle
Once the UVs are done, check that there is only one UV Set on the Lists -> UVMaps area (the model can have several texture maps/materials, but this is the UV Sets)
Having more than one can make the model appear grey in the Editor
UV Set Name: map1
Assign a material or materials to your model - this will be the meshmaterial's name in the Editor later, so it should reflect your model's name
Power of Two is a set of simple criteria to ensure the 2D image assets follow the regulated sizes and dimensions:
Width/height divisible by 8, and/or,
Width/height that can be doubled-up or divided down by 2
Modern games prefer dimensions of 1:1, 2:1, or 1:2 for ease of use, speed, and processing
This is notwithstanding the additional preference for the use of texture 'sheets' where a single image may contain several areas that are independently mapped to completely separate objects
In practice, the textures should thus be e.g. 64px x 64px, 512px x 256px, 2048px x 2048px and so on, 4096px being the highest and biggest we can currently feasibly go with our technology
Abbreviations:
1024px x 1024px = 1k
2048px x 2048px = 2k
4096px x 4096px = 4k
Optimizing the UVs
It's important to optimize the UV space so that you can use as small texture size as possible
When to use several smaller maps instead of one bigger map, and when to use one big map instead of several separate maps?
Think about the different situations the asset will be used in, and what is the most optimal
One map
If you can assume that the set of models will be often used in the same level, try to put them in one texture map
Each separate texture map will add one more draw call so it's often better to have one big texture than several small textures
In general, it's good to have same sized assets having the same texture map
Several maps:
If you have some huge maps with e.g. big rock textures, it might be a good idea not to put the tiny pebbles in the same big map
The tiny pebbles will most likely be used separately, too - if they're in the same huge texture map than the big rocks, the Editor will need to load the huge texture each time for them, even if the big rocks aren't used in that particular level
If the pebbles are in a separate map, their map can be quite small (e.g., 128px x 128px, depending on the texel density), so it would be bad to have to load the huge 4096px x 4096px size map containing the huge rock textures
When and How to Optimize
How much you can/should optimize will depend on a couple of factors:
The intended use of the model: If the model will only be seen from far away, there is no need to optimize as much as for e.g. a first-person model, but it's always a good practice
The intended texture size: If you have small textures, and your UV islands are close together, the texture can bleed from one island to the next - in this case, you should leave more padding between the islands
The shape of the model and the UV islands: Sometimes, especially with organic models, the UVs can be pretty round/curved/wavy. These kinds of UVs will naturally have more wasted space; UVs for hard-surface models can be easier to optimize
How much you're willing to cut/break to make the UVs fit better: Cutting the UVs into smaller bits can make it easier to fit them tightly together, but this can result in unwanted seams. Again, hard-surface models might have an easier time with this
It's much easier to optimize the UVs of a hard surface model compared to an organic model, but do your best to save the UV space:
For a hard surface model it's easier to optimize the UV map
For an organic model it's harder to optimize the UV map
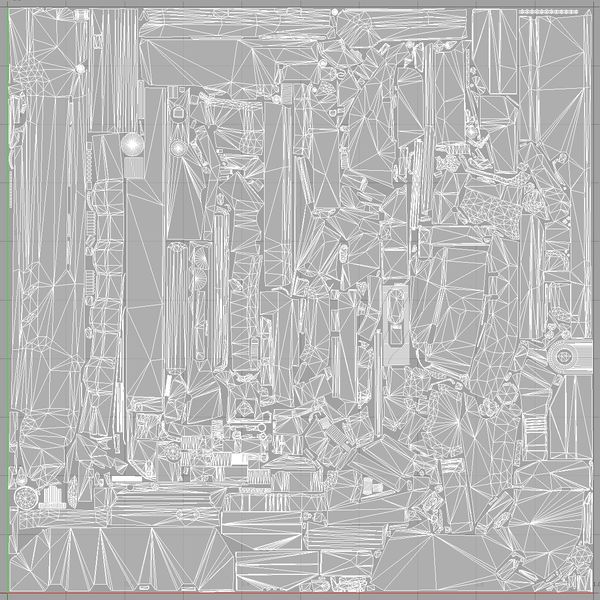
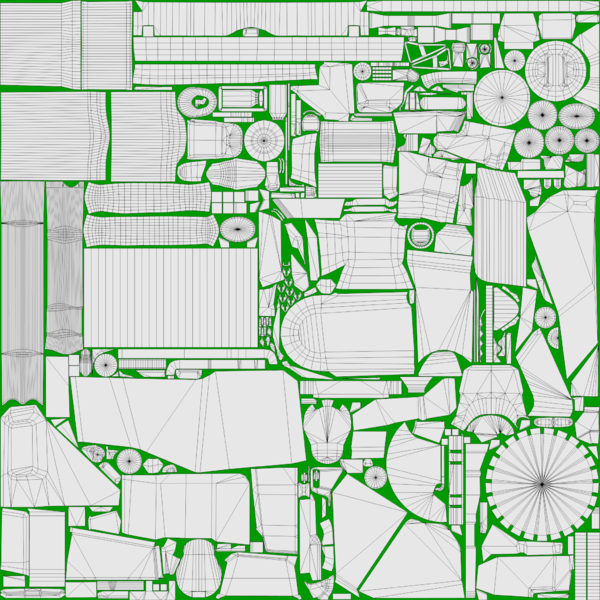
Left: UVs for a gun model arranged by hand with very little space between UV islands. Right: UVs arranged with "pack UVs" feature creates more empty areas between UV islands:
UVs for a gun model arranged by hand with very little wasted space
UVs arranged with "pack UVs" feature creates empty areas between UV islands
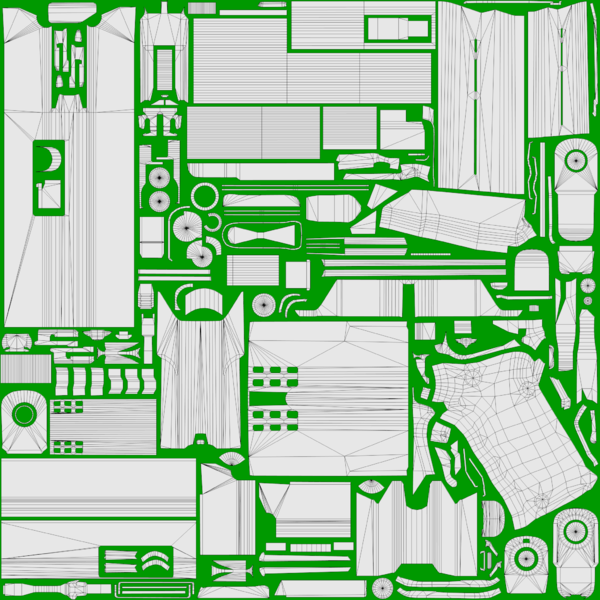
Left: UVs for a saw tool model arranged by hand with almost no space between UV islands. Right: UVs arranged with "pack UVs" feature creates more empty areas between UV islands:
UVs for a saw tool model arranged by hand with almost no wasted space
UVs arranged with "pack UVs" feature creates empty areas between UV islands
Sometimes, though not often, you might want to give more UV space to a particular part of the model
More UV space means that those UV islands will have bigger texel density than the rest of the UV islands
This way, the most important parts will have better texture quality, and the parts that will not be seen up close will be slightly worse, but not very noticeably
E.g. when making a model that's meant to be viewed in first person, you might want to give more UV spaceto the parts that will be closer to the camera (such as the stock, handle or sights of a gun), and less to those further away (such as the tip of the barrel, or the bottom parts of a gun)
Recycling, Mirroring, and Tile Textures/Trimsheets
 For a hard surface model it's easier to optimize the UV map
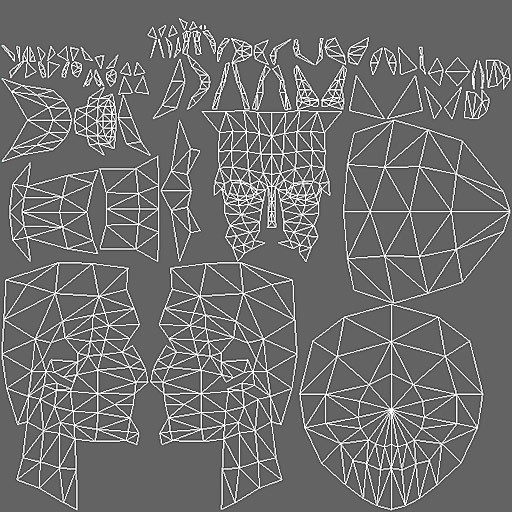 For an organic model it's harder to optimize the UV map

 UVs for a gun model arranged by hand with very little wasted space
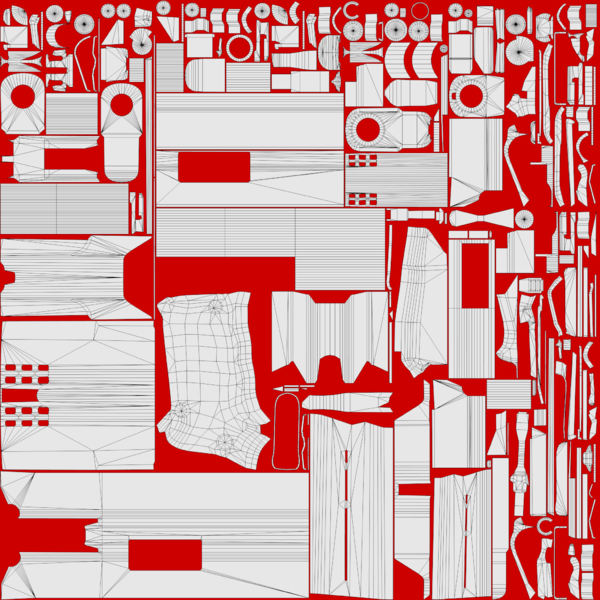 UVs arranged with "pack UVs" feature creates empty areas between UV islands

 UVs for a saw tool model arranged by hand with almost no wasted space
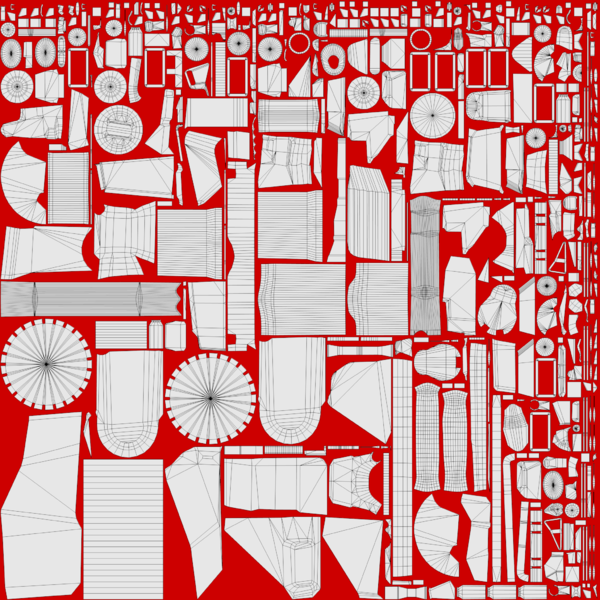 UVs arranged with "pack UVs" feature creates empty areas between UV islands


