3D Asset Workflow: Billboards
- This guide is a part of a series of 3D asset creating process related wiki sites 3D Asset Workflow
- For modeling you'll probably find a lot of useful general info on the Modo guide
Preparation
- This guide goes into detail on how to bake billboards using Substance Designer
- Export your game-/editor-ready low poly mesh as their own fbx-file
- You can have multiple meshes in a single file as long as they use the same texture maps and they are named properly
- Same way as if you were baking with Substance Painter
- See Baking with Substance Painter for reference
- You will also need the diffuse/albedo, normal map and specular map for the exported low poly
Create your billboard mesh
- Import your low poly mesh into Modo
- Go into front orthographic view by pressing numpad + 2 (revert to perspective with numpad + ,)
- Use the pen tool to draw a plane that covers the low poly mesh. Try to make the plane silhouette match the low poly as closely as possible to reduce the number of rendered transparent pixels.
- Connect the vertices (Ctrl + L when 2 vertices selected) and create a UV map
- Center the billboard and duplicate it to a new mesh layer
- Move the duplicate away from the low poly, until they no longer intersect
- Now you have 3 meshes: Game ready low poly (used as high poly), billboard plane (used as low poly), and the offset duplicate (cage)
- Export your billboard and cage as separate files
Substance Designer
- Open Substance Designer and make a new substance (File > New Substance, or Ctrl+N)
- Settings don't matter at this point, empty graph works as well as any other
- Right click on Unsaved package in the left side panel, and select Link > 3D mesh
- Select your billboard mesh
- The imported mesh can be found in the resources folder in the same panel
- Right click on the imported mesh and select Bake model information
Bakers
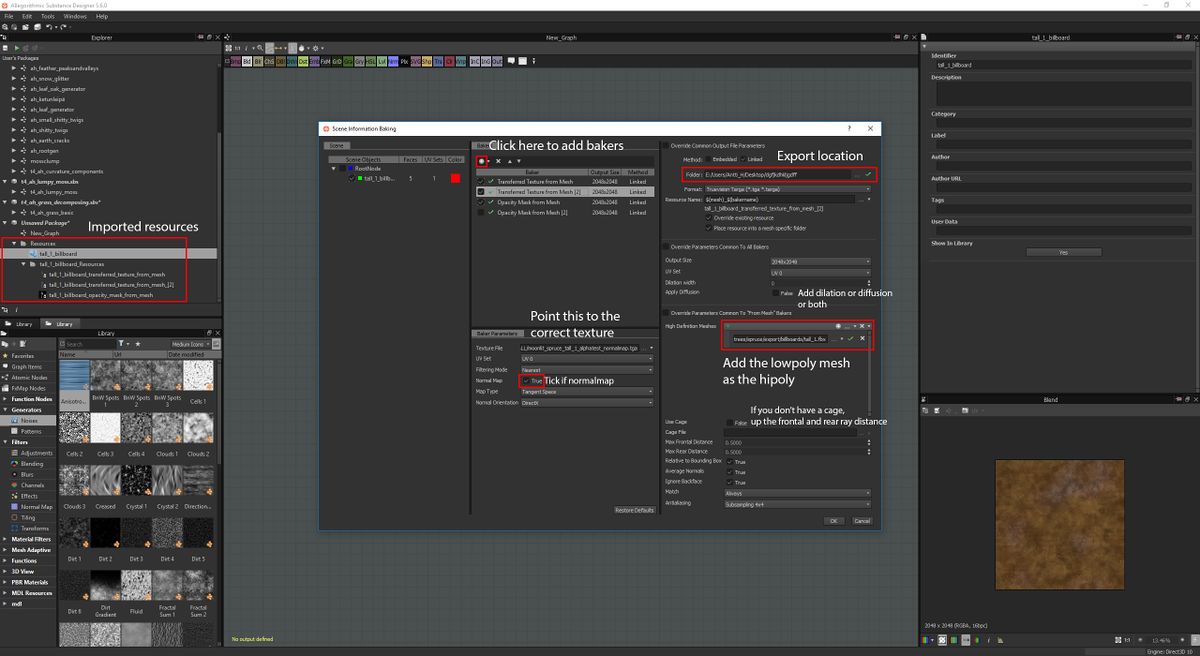
- In the dialog, click on the small + -sign in the middle panel labeled 'Bakers', and select Transferred texture from mesh
- Add 3 of them. Select each new entry and point them to albedo, normal and specular.
- Remember to tick Normal map -checkbox in the case of normal map
- Reference for Substance Designer bake settings:
Bake parameters
- Most of these settings are the same as in Painter
- In the right side panel, select the export folder, output size and dilation amount and/or diffusion
- For the high definition mesh(es) select the game ready low poly
- Add the cage if you have one. If not, increase the Max Frontal and Rear distance until no clipping occurs.
- Match By mesh name if you are baking multiple meshes at once and have them properly named. Otherwise use Always. Antialiasing 4x4 or 8x8.
- Press OK to bake the maps
Baking the opacity/alpha
- For a opacity map, that has individual leafs and their back faces taken to account as well, start by importing your low poly tree into Zbrush
- In Zbrush Separate your leaf planes in to another subtool
- You can do this by using Auto Groups in polygroups menu, then hide all the leafs and in subtool menu -> split hidden.
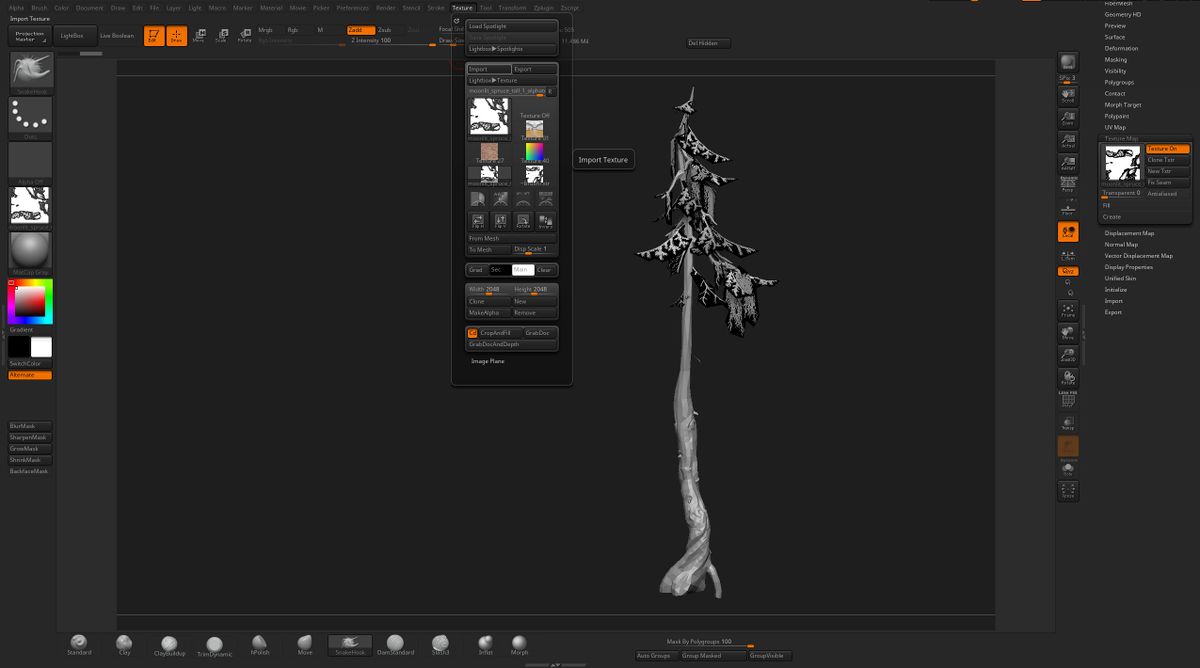
- Now Import your opacity map for the leaf planes into Zbrush
- Remember to flip your texture in ZBrush. Texture -> flip v and apply it to the leaf planes subtool
- For applying the texture into your leaf planes go to Tool -> Texture map
- Applied texture on leaf planes:
- Next you will need to subdivide the leaf planes in such way that they don't get smoothed
- In Tools -> Geometry next to Divide button turn Smt off
- Subdivide the mesh until it is over 1 milj points
- You might need even more subdivision if you are not getting desired sharpness/resolution later
- Transfer the texture map in to polypaint: Tool -> Polypaint -> Polypaint From Texture
- If the Polypaint looks blurry try increasing the subdivision and repeat Polypaint From Texture command
- Next you will need to polygroup your black colored areas and delete them: Tool -> polygroups -From Polypaint
- Now to get backsides to show up for the leafs apply panel loops to them: Geometry -> Geometry -> Panel Loops
- Adjust the thickness to be low amount and set Polish to 0
- Also you can decrease Loops amount. Test what thickness value works best for your asset.
- Thickness value is effected by the assets size, so it can vary with each model
- Merge your leaf plane subtool into your trees trunk and export the subtool out as obj or FBX
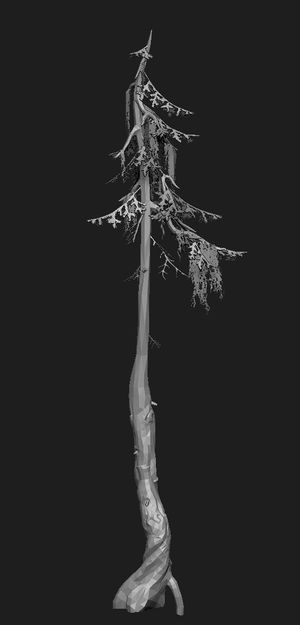
- How the tree looks like before exporting it:
- Create low poly billboard planes for your tree and cage mesh for it as well
- After that in xNormal set the model that you just made in Zbrush in to the high poly mesh slot
- And add the low poly billboard model in to the low poly slot. By right clicking in that same slot you can assign custom cage mesh.
- In Baking options select for example Bake base texture as the map you want to bake
- Set Edge padding to 0 and antialising to 4x
- Once the bake is finished open the map in Photoshop and turn the base color to white or copy that textures alpha channel, as xNormal creates for all of its bakes usually an alpha channel also.
Bake
- The baking process is the same, but instead of Transferred texture from mesh, select Opacity Mask from Mesh From the bakers-panel, and change the high definition mesh to the one described above.
Editor
- In Photoshop, paste the baked opacity map to the textures alpha channel (Add the alpha channel from the channels tab by clicking on the new channel button).
- Only the albedo needs the alpha channel, so save it as a 32-bit tga and name it [texturename]_alphatest.tga.
- Export the rest of the maps as 24-bit tga and name them [texturename]_alphatest_[suffix].tga.
- More about naming conventions in Naming conventions.
- After importing the billboards to the editor, check BillboardY in the model component to make the billboard follow the camera on Y-axis.
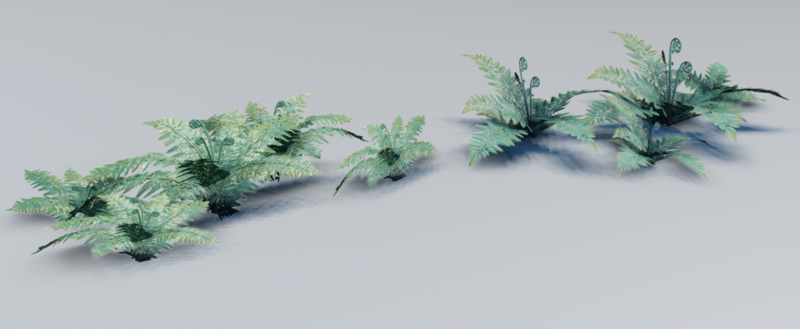
- On the left is the billboard version of the fern group seen on the right:


