Difference between revisions of "3D Asset Workflow: Retopology"
m (→Frozenbyte Lowpoly Model examples) |
m (→Frozenbyte Lowpoly Model examples) |
||
| Line 172: | Line 172: | ||
File:Book chomber.png | File:Book chomber.png | ||
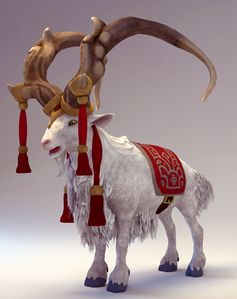
File:Npc goat.JPG | File:Npc goat.JPG | ||
| − | |||
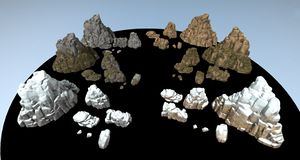
File:Blocky rock alternative textures 01.jpg | File:Blocky rock alternative textures 01.jpg | ||
Revision as of 10:15, 1 August 2023
- ◇ Main Steps
- 3D Asset Workflow: Concepting
- 3D Asset Workflow: Sculpting
- 3D Asset Workflow: Retopology
- 3D Asset Workflow: UV Mapping
- 3D Asset Workflow: Baking
- 3D Asset Workflow: Texturing
- 3D Asset Workflow: Asset Assembling
- 3D Asset Workflow: Naming the Asset
- 3D Asset Workflow: LODs
- 3D Asset Workflow: Exporting to Editor
- 3D Asset Workflow: Completed asset checklist
- ◇ Additional Steps
- 3D Asset Workflow: Alternative Textures
- 3D Asset Workflow: Billboards
- 3D Asset Workflow: Blocksets
- 3D Asset Workflow: Collisions
- 3D Asset Workflow: Sikailu
- 3D Asset Workflow: Sway
- 3D Asset Workflow: Tile Textures and Trimsheets
- 3D Asset Workflow: Tintmask
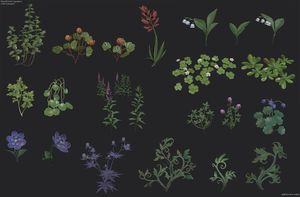
- 3D Asset Workflow: Vegetation
- ◇ General Tips and Troubleshooting
Summary
We use Modo for this work phase, so all of the notes and screenshots here are mostly Modo specific
- Retopology means creating a low density mesh based on the high-poly sculpt
- What's considered "low-density" has greatly to do with the platform the game will be played on: we're making PC/console games, so we can afford more polygons than e.g. mobile games
- The assets still need to be optimized, so don't add unnecessary geometry where it's not needed (e.g., where it doesn't affect silhouette at the gameplay camera distance, in most cases)
- What's considered "low-density" has greatly to do with the platform the game will be played on: we're making PC/console games, so we can afford more polygons than e.g. mobile games
- Keep all the models of one 3D asset set in one Modo file
- For example, if you have a big set of furniture, keep them all in one Modo file, on separate layers (and export them to the game as one FBX)
While retopoing, keep the following things in mind
- The scale of the object in the game world in general
- If the object is huge and covers a lot of area in the camera view, it's justified to use more polygons in it
- Small details can be retopoed flat, as the baked normal map will add the necessary amount of information there, but forms that will be seen in the silhouette need to be retopoed
- Floaters can also be used to create detached geometry that looks like it's attached, even if it's not
- The distance in which it'll most likely be viewed at
- If the object is huge but will be used far in the background only (e.g. mountains), less polygons are needed for it to look good
- Can some parts of the asset be mirrored?
- Mirroring symmetric parts of the assets will save retopology time, as well as UV space
Retopology Steps
- Once your sculpt is exported from Zbrush, it's time to retopo the model
- If you have the base mesh done before sculpting already, then you can use that as the low-poly model - just make sure that the meshes still line up and match correctly
- Retopo the sculpt using topology tools and basic modeling tools, or start with a decimated triangle mesh (triangelihuttu) and optimize/clean it up
- You can also use both methods partially in one mesh
- Symmetrical parts of the model can be mirrored - this way, you don't have to do the same retopology work twice
- Add hard edges using the Vertex Normal Toolkit - usually hard edges need to be added for any angle 90 degrees or more (on both outwards or inwards turning angles)
- Especially important for hard surface models - most natural environment assets don't need these, as they don't have steep angles
- In the end, it's good to check that there are no holes or n-gons (polygon with more than 3 or 4 vertices) in the mesh, and perform the Mesh Cleanup command
- Our Editor won't render ngons, so they will look like holes in the mesh
- Note: the Mesh Cleanup merges the vertices that are in the same position, so if you have duplicated alpha planes (in e.g. tree foliage), they'll be merged
- More info on fixing geometry
- Once the model is ready and has hard edges assigned, it's time to make the UVs
Good topology for animation
General rules
- Static objects need less polygons where they won't be clearly visible, but with the animated models, the 3D artist needs to think what those parts look like when deformed (e.g. armpits, knees, corners of the mouth)
- The edge flows of the deforming areas should be clean - if the loops are messy and the area needs to bend a lot, it'll create even messier a silhouette when deformed
- Also, when the edge flow is clean, it's easier to select loops and weight paint - it saves a lot of rigger's time!
- If the model is animated but only swaying slightly or is shown very far, then these points becomes less important
- For characters this is important - especially if they will be shown close-up in e.g. cutscenes!
- Model characters' eyelids thick enough - in a game rig there's only one (1) bone for each lid
- Some of the vertices has to be partially weighted, which means that when the controller is rotated, the vertices move slightly inwards
- If the lid surface is too close to the eyeball, the lid will clip - this is easily fixed by making the lid thicker
- Same applies to all layered geometry, like clothing
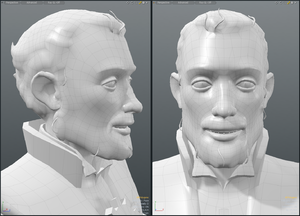
Retopoing a characters' face
- Continue the loop inside the mouth, don't stop it at the corner
- When the character opens the mouth wide open, there needs to be enough geometry to smoothly deform the mesh
- Don't use triangles in places that break the flow of the surrounding loops
- Fillers like these are fine when the polygons would stretch too much otherwise and it supports the flow
- Don’t over optimize by stopping the loops in middle of the surface when it’s not absolutely needed - end the loop in less deforming area instead

- Interior of mouth should be modeled so that teeth + tongue fit in neatly
- When the character opens the mouth normally, the teeth shouldn't clip - the rigger can't fix clipping with weight painting, if the clipping is already there in the model
- Make sure there are enough polygons between the lips and the teeth, so that precise weight painting is possible
- Clean edge flow helps here as well!

Retopo in Modo
- Check Modo for more detailed info on Modo's configuration, modeling tools and hotkeys
- Check especially the Topology Tools section
- Import the highpoly model to Modo
- Create a new mesh layer and name it as [partname]_[suffix], where
- [partname] matches with the name you gave to the subtool in Zbrush, and
- [suffix] separates this from the highpoly model, e.g. _lp or _low
- For example, if you want to retopo a mesh which was named as 'hobbitfoot_hp' in Zbrush, you should name your mesh layer as 'hobbitfoot_lp'
- This is because when baking, the software (Substance Painter) needs to be able to match the parts together and know which is which
- Note that the naming is case sensitive!
- For example, if you want to retopo a mesh which was named as 'hobbitfoot_hp' in Zbrush, you should name your mesh layer as 'hobbitfoot_lp'

Two ways to retopo
Note that if you have made a 3D base mesh before sculpting, that mesh can be used as the lowpoly model either as is, or tweaked, depending on the case
- More detailed info at Topology Tools
- The two ways, which can be used intertwined in the same asset as well:
- Retopoing by hand
- Pros: Nice and clean mesh that is easy to UV and add hard edges to, and that deforms nicely in animation
- Cons: Takes more time and effort
- ZBrush generated triangle mesh aka "triangelihuttu":
- Pros: A quick method for assets that don't need to have nice quad geometry, e.g. natural rock assets, terrain
- Cons: A bit more difficult to UV map neatly at times, harder to add hard edges where they need to be, doesn't work well with animation
- Here you can see the both retopo results in one character asset
- Most of the Owl is retopoed by hand
- Wing feathers are triangulated

Retopoing by hand
If you have an animated character, a symmetrical, and/or some quite basic geometrical shape model, you'll probably want to use this method
- Summary:
- Results in a mesh made from quads (and triangles in the areas where needed)
- Usually takes more time than the triangle method, but can also be surprisingly faster in some cases
- Easy to edit & optimize
- Easy to see if the topology of the mesh is optimal in all the areas
- Easy to make UVs as the edge loops are easy to select
- Deforms nicely when rigged & animated
- Sway usually works O.K., if it's not too drastic
- Switch to Topology tab and start retopoing. Here are a couple of useful videos explaining how the retopoing tools work:
"Triangelihuttu": A decimated triangle mesh made in Zbrush & cleaned up in Modo
If you have an organic, non symmetrical, not clearly any basic geometric shape model that is not going to be animated nor deformed too much, you can use this method. Sometimes this is even better method than the hand retopo one. For example, you might lose time needlessly by making a clean retopo by hand for a rock model. If it's not really necessary to have clean edge loops, use this method!
- Summary:
- Results in a mesh made from triangles
- Can be much faster than retopoing by hand
- Needs to be cleaned up and optimized in Modo
- E.g. by welding geometry and using the Reduction Tool for the whole mesh or selected parts, and getting rid of triangles that are stretched too thin
- Harder to edit & optimize
- Harder to see if the topology of the mesh is optimal in all the areas
- Harder to make UVs as the edge loops are harder to select
- Deforms badly if rigged & animated
- More about the Triangle mesh workflow

Density of the Lowpoly Mesh
- What's considered "low density" has greatly to do with the platform the game will be played on: we're making PC/console games, so we can afford more polygons than e.g. mobile games
- The assets still need to be optimized, so don't add unnecessary geometry where it's not needed
- However, do add simple backfaces, e.g. don't leave holes to the model even if it's most likely always e.g. sitting on the ground
- This makes the asset more usable for the level artists
- Keep the scale of the object in mind
- If the object is huge and covers a lot of area in the camera view, it's justified to use more polygons in it
- Small details can be retopoed flat, as the baked normal map will add the necessary amount of information there, but forms that will be seen in the silhouette need to be retopoed
- Floaters can also be used to create detached geometry that looks like it's attached, even if it's not
- In general, we want round areas to look round in the silhouette
- Always check how the silhouette looks at the distance the object will be most likely looked at
- In most cases, the distance is the camera distance, which can be checked by e.g. exporting a temp version of your model to the game and testing it that way
- Always check how the silhouette looks at the distance the object will be most likely looked at
- If the geometry will not affect the silhouette, delete it
- If the asset is not a character that will be deforming in animation, you'll only need to worry about the silhouette
- Delete all unnecessary, overlapping geometry, which can sometimes be left inside the actual model by accident
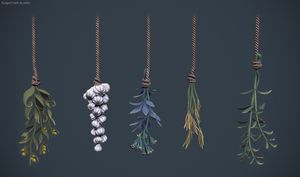
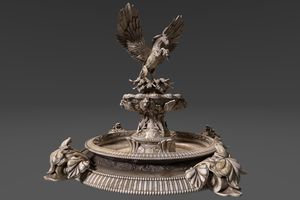
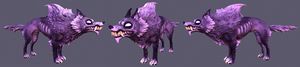
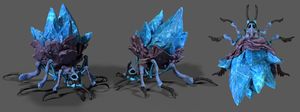
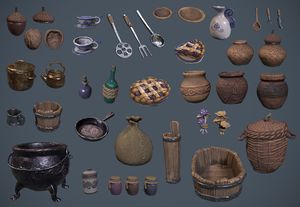
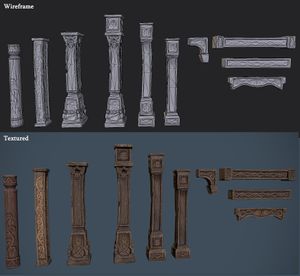
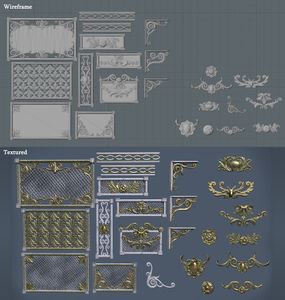
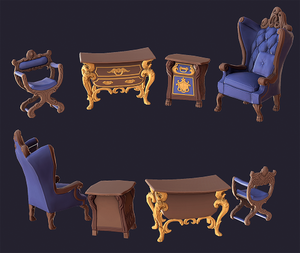
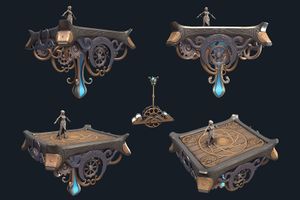
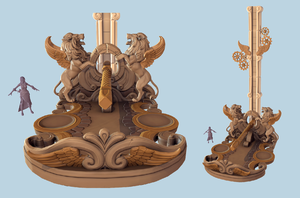
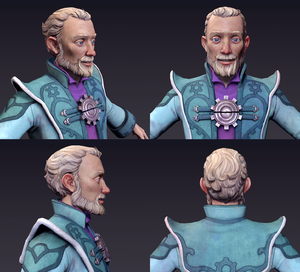
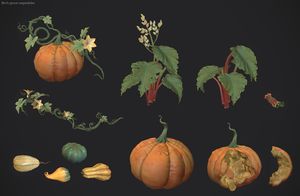
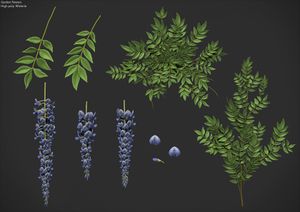
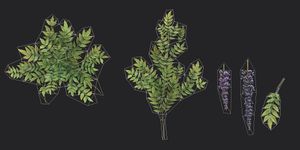
Frozenbyte Lowpoly Model examples
Lowpoly model gallery
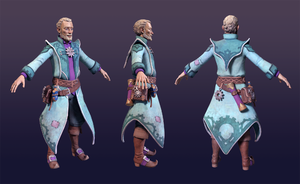
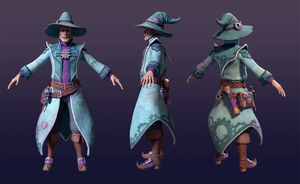
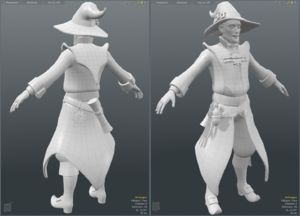
Amadeus wire frame, about 13500 polygons (25000 triangels in the game engine)
Pieces used to build bigger arrangements
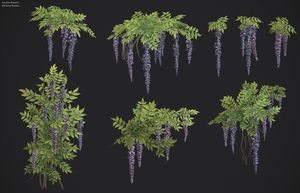
Arrangements built from smaller pieces
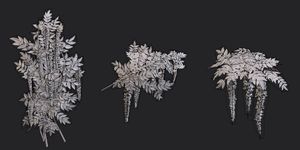
Model wire frames
Flat piece wire frames