Static objects: Difference between revisions
Copied the article from the old wiki |
(No difference)
|
Latest revision as of 09:21, 15 June 2018
Shadwen Editor Tutorial Main Page
-> Next tutorial (Dynamic Objects)
<- Previous tutorial (Getting Started)
This section covers the basics of inserting objects to levels, and using the move, scale and rotate tools to adjust them. This tutorial focuses on static objects - objects that are not affected by in-game physics, such as gravity. Static objects are used to build walls, floors, platforms and other objects that the player can walk on and touch, but which will never move.
- Level path in Shadwen Public Editor: \data\mission\editor_tutorial\02_static_objects
Basic Tools
"To interact and modify these static objects, you'll first have to select the right layer, which is collision layer in our case, and then select the object by clicking on it.
If successful, the object will be highlighted with its name visible.
We'll start by looking at the most commonly used tools which are located on the Toolbar next to the "Tools:" text."

Move Tool (Hotkey 1)
Move the selected object(s). Press SPACE to switch between different movement axis. Hold SHIFT when trying to move the object to make a copy instead.
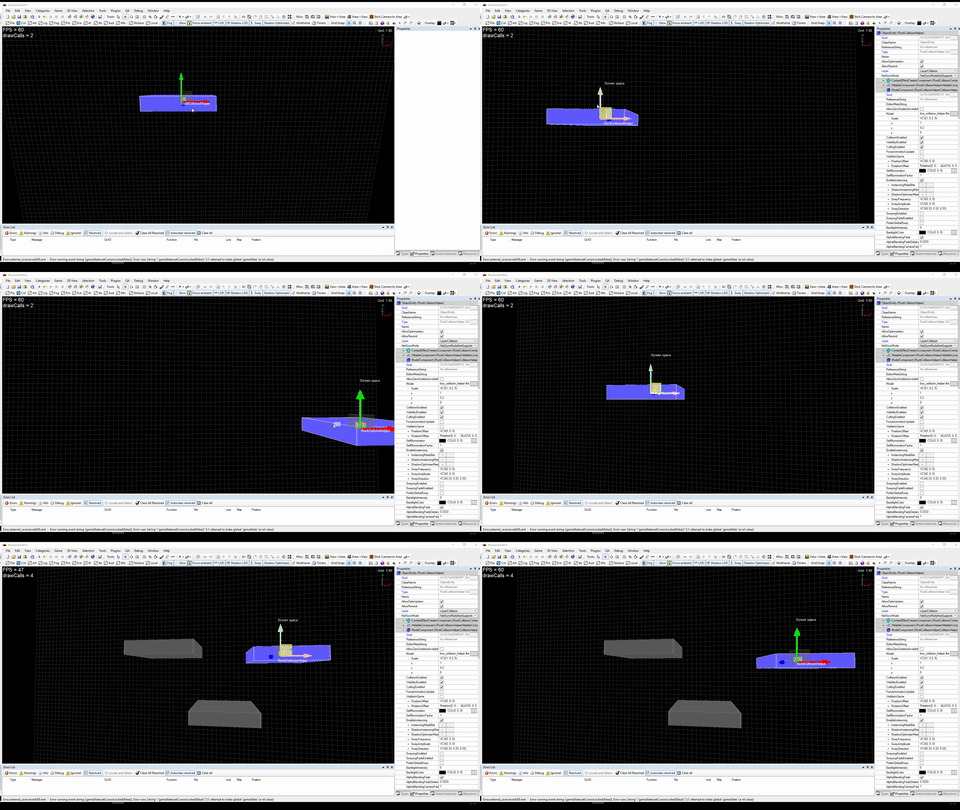
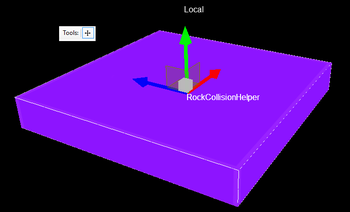
"The second one in the row is called move tool which is used to simply move the objects around. When selected, it will display three colored arrows on a selected object which you can grab to slide the object along the chosen arrow.
All the arrows represent a different axis: red being X, green being Y and blue being Z.
You may also move the object on two of these at the same time by grabbing the square shape on the corner of two arrows. By grabbing the cube in the middle, you may also select all three at the same time but it's not recommended."
"While working with the three different axes, it's important to know what the axes are actually aligned with. There are three different options:
- Global = the axes are globally same for every single object in the scene.
- Local = the axes are aligned along the object's current orientation, making them all unique from each other.
- Screen space = the axes are aligned along your current view of the scene, making it rotate every time you rotate the camera.
Your current alignment is mentioned above the axes of a tool you've selected and you can easily change between them with space key. If you find axes pointing to undesired directions, try changing the alignment with space!"
TIP: Whenever you make mistakes and want to undo an action, you can revert it by pressing CTRL+Z."
Rotate Tool (Hotkey 2)
Rotate the selected object(s). Hold CTRL to snap in 15 degree intervals.
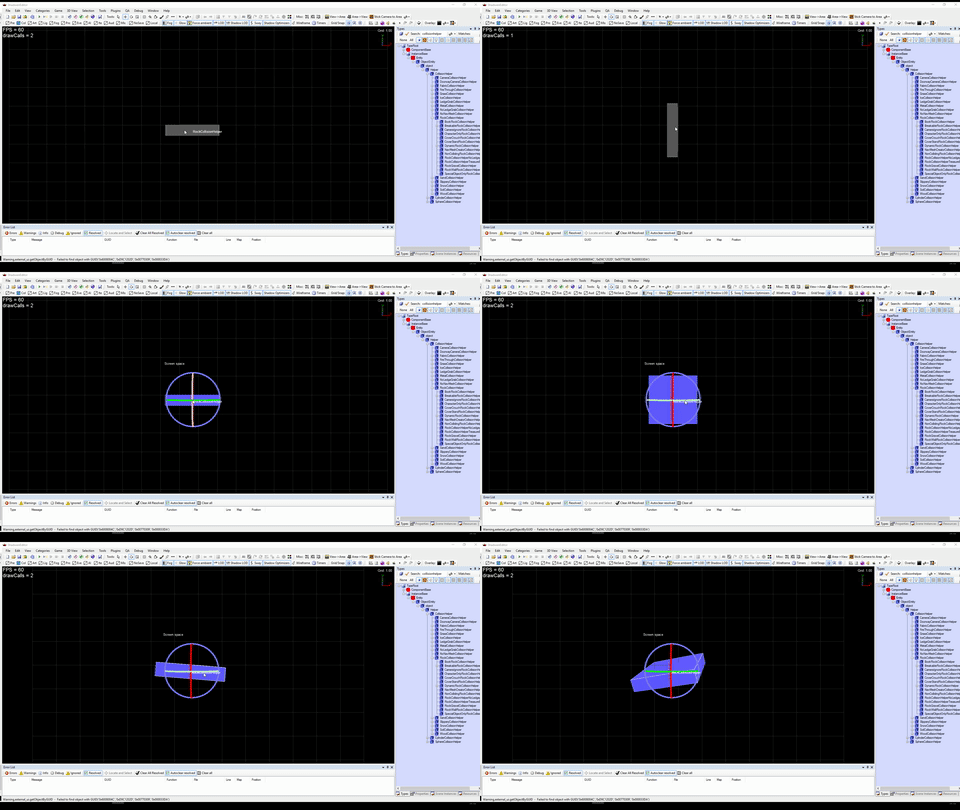
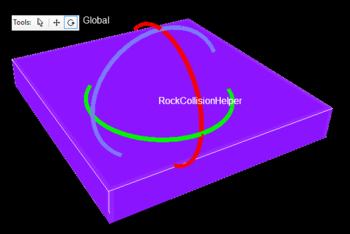
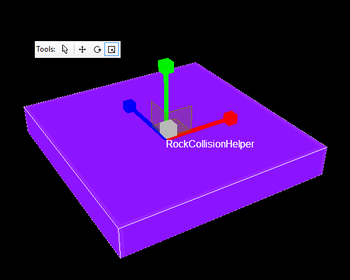
"Next up is the third button from the left, rotate tool, which lets you rotate an object in place.
When selected, it will display three coloured circled which you can grab to rotate an object around that circle.
As with the move tool, all the differently coloured circles represent their respective axes.
You may also grab the object from anywhere in between the circles which allows you to rotate it freely on all three axes at the same time."
Scale Tool (Hotkey 3) & Scale Specific Side Tool (Hotkey 6)
Scale the selected object. You can scale a single or multiple axis. You can also scale the object from its Properties → ModelComponent → Scale by changing the values of x, y, and z.
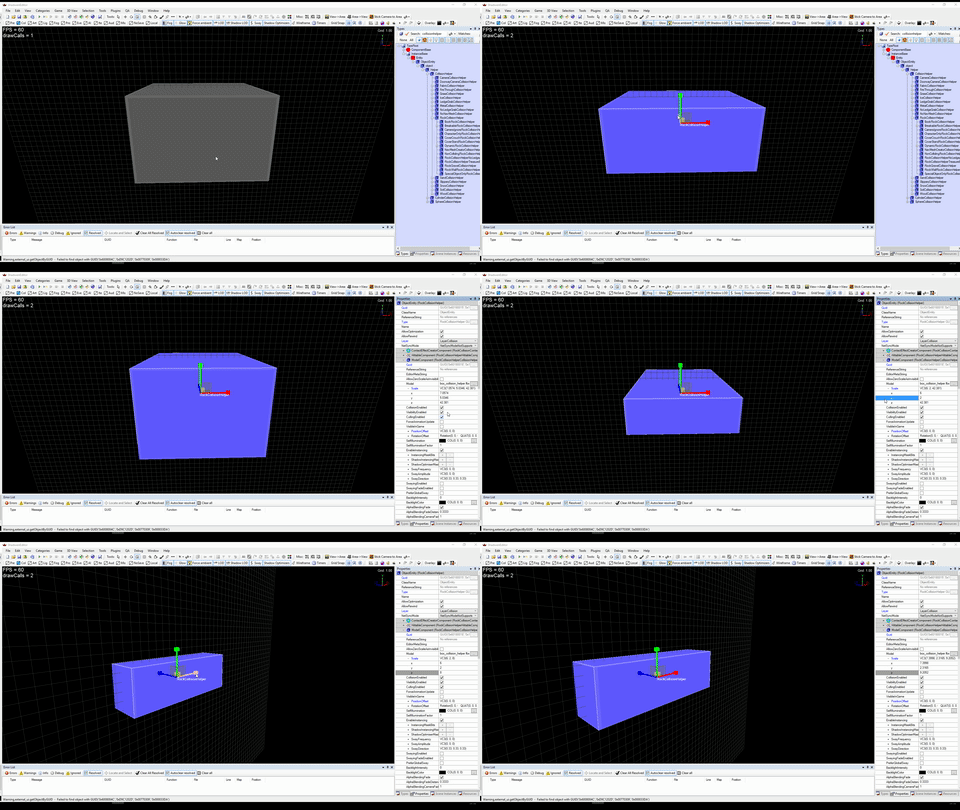
"The third and fourth most common tools are scale tool (fourth button from left) and scale specific side tool (seventh button from the left) which lets you scale an object to a different size and shape.
When scale tool is selected, it will display three coloured "hammers" which you can grab to resize the object symmetrically on that axis.
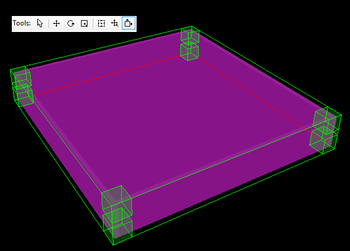
When scale specific side tool is selected, it will display box shapes in all of the object's corners, allowing you to grab any of them and move it anywhere you want to resize it.
As you would probably guess already, the differently coloured hammers represent different axes. You may also grab the center cube to evenly resize it at the same time, conserving its original proportions.
Note that the scale tool only allows you to modify the object along its local axes, global or screen space axes cannot be used."
Copying & Cloning Objects
"A lot of the time, the fastest way to quickly build out your level is to clone existing objects.
A fast way to do this is to use the Move Tool, and hold shift and then move the object. Instead of moving the object, you will get a new clone of your selection.
You can also copy and paste (CTRL+C - CTRL+V) selected objects."
If you want to clone a object and have the clone be at the exact same spot as the original you can use Ctrl + Shift + V after copying the the desired object with Ctrl+C to place the object where the original is. Keep in mind this cannot be done if you edit the original object in between the copy and paste, you'll just end up placing the new cloned object where the original was. This can be used to your advantage in some situations though.
Video tutorial of cloning objects and measuring smooth jumping distances.
Collision Helpers
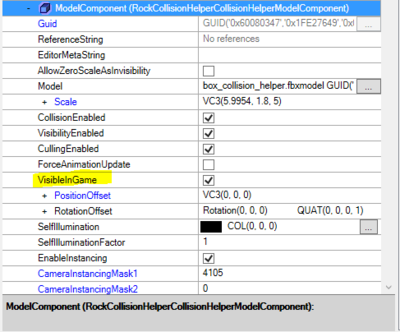
"Collision helpers are handy building blocks that can be easily scaled to any size or shape.
By default, all collision helpers are invisible when you run the game - the idea is to use collision helpers to sketch out your level and make sure it works gameplay-wise, then later add art objects to make the level look nice.
If you want to make a collision helper visible in-game, you need to edit its ModelComponent and set VisibleInGame to TRUE (check the checkbox).
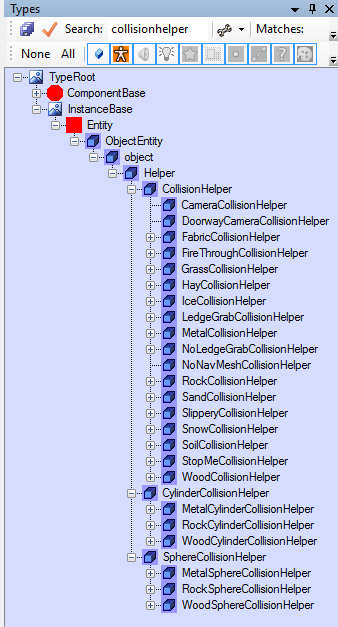
To easily find collision helpers from the type tree, it's recommended to write "collisionhelper" on the search bar and follow this path:
TypeRoot > InstanceBase > Entity > Objectentity > object > Helper > CollisionHelper"
The Static Objects tutorial level contains the following assignment, where you can try this out:
Find the object called RockCollisionHelper in either the Type tree or Categories.
Add some of these to your level. Go to their Properties (View -> Object Properties) to set their ModelComponent: VisibleInGame property to TRUE to make sure you can see them when you run the game.
Use your newly created Collision Helpers to build a path up to the platform above.
Use all the Tools - Move, Rotate, Scale - to make a fancy and creative path up!"
"Here are various tips that will help you in building activities!
- Hold down SHIFT to select multiple objects.
- Hold down CTRL and drag with your mouse to select multiple objects in an area.
- When placing an object from the Type Tree, hold SHIFT to position it onto a collision surface."
If you end up selecting objects you don't want to be in the group you are making, you can just hold shift and click them again. This removes the selection from the wanted object. The SHIFT movement to collision surface only works when you first bring an object from the Type Tree, if done in any other time you will end up cloning the object. Also keep in mind that this collision surface movement can be a tad finicky, so be precise and patient with it.
Object Properties
"All objects in the game, static or otherwise, have a number of properties. These properties tell the game how the object will behave in the game world.
You can edit any property of an object to change its behavior. Select an object, then look at the Object properties window (Ctrl+P). All values here can be customized.
It's also possible to add completely new properties for an object but we'll return to that in a later tutorial."
The properties of the object are divided into different components for easier usage. One component usually handles one task of the object and they are named to correspond to that. PhysicsComponent for example handles the objects physics related things. More of these components/properties will be discussed in the next tutorial that covers Dynamic Objects.
Grid
"The editor has a grid function which helps you to align objects accurately and measure distances more easily too.
Remember the different jumping distances from before? This tool has been tailored to measure those kinds of things.
Snap to grid can be toggled from the second icon next to the "Grid/Snap:" text in the toolbar or by holding CTRL while moving an object.
You are also able to resize the grid snap size for every tool separately from tool configuration (the wrench icon in the Toolbar).
It contains a lot of other useful options as well so keep this menu in mind!"
In a nutshell, the can be used to help you position your objects in the level. Movement is done aligned to the white grid you can see in the background one by one. You trade flexibility to precision.
Vertex Snap
"One last editing tip:
VertexSnap is a very useful tool that makes it possible to align corners of objects directly onto corners of other objects.
This is done by first selecting an object (such as a CollisionHelper), pressing V, then clicking on a corner of the selected object.
Now choose a corner of a different object to snap the first corner directly onto the second corner, making them share the exact location!
This is particularly useful when you want to quickly mends separate objects together with flawless precision."
Optimizing Jumps
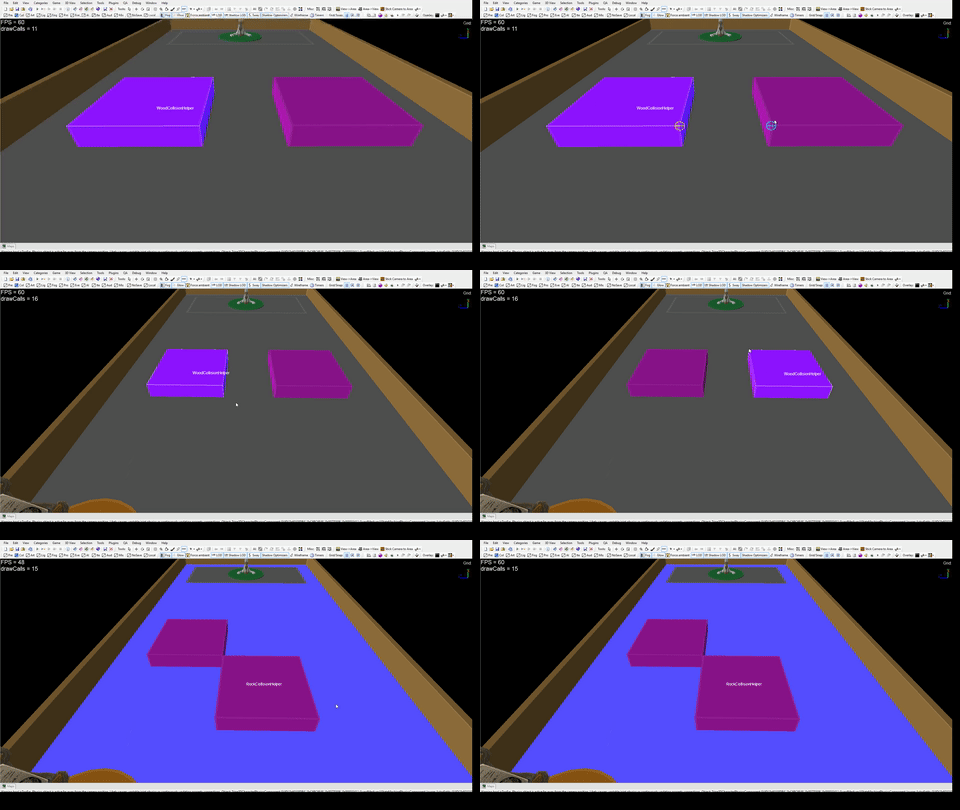
"Every single jump in every single level is important, and needs to be carefully optimized.
While a jump that's slightly too short may not be exactly difficult, not being able to simply hold down a direction key and jump away can be very irritating and give a bad experience to the player.
Keep in mind as well that players tend to jump slightly before the edge of a platform, not exactly at the end of it."
Another thing to keep in mind with jumps: different players have different ways to jump, so there are many different heights and lengths possible. It is good to make your jumps possible with as many ways as possible. Unless you're aiming for super precise platforming challenges.
"A good jumping length in Shadwen is 4-4,5m."
"A good jumping height in Shadwen is 2m if there are no ledgegrabs."
"A good jumping height in Shadwen is 4-4,5m if there is a ledgegrab."
An quick and easy way to check the height of your jumps is to use the wooden box you see all around the game as a scale. This one is exactly 2m tall, so it can be used for quickly checking your jumps. It can be found from the Type Tree under:
- InstanceBase -> Entity -> object -> castle -> props. It is named cellar_prop_set_box_cube_dynamic_breakable
"A good jumping height in Shadwen is 4m if there is a ledgegrab, and a good distance between ledgegrabs is 3m."
Shortcuts
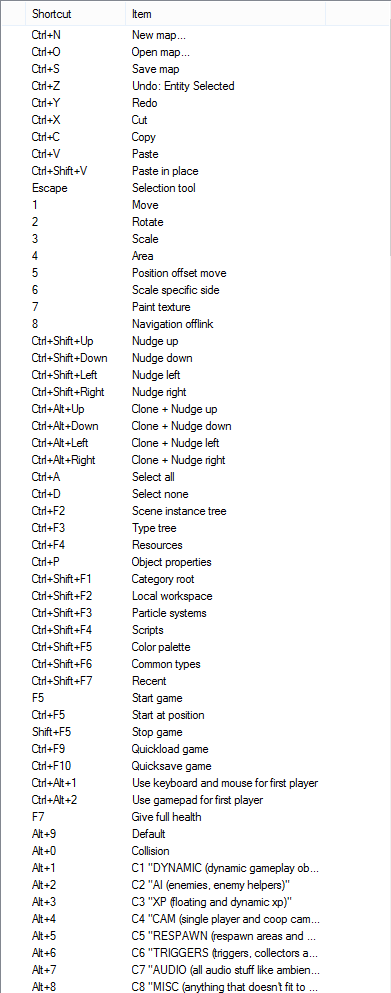
"You may have already started using primarily the shortcuts for selecting the tools that you just practiced.
After all, they're placed pretty conveniently right next to each other in the same order (1 = move, 2 = rotate, 3 = scale, 6 = scale specific side).
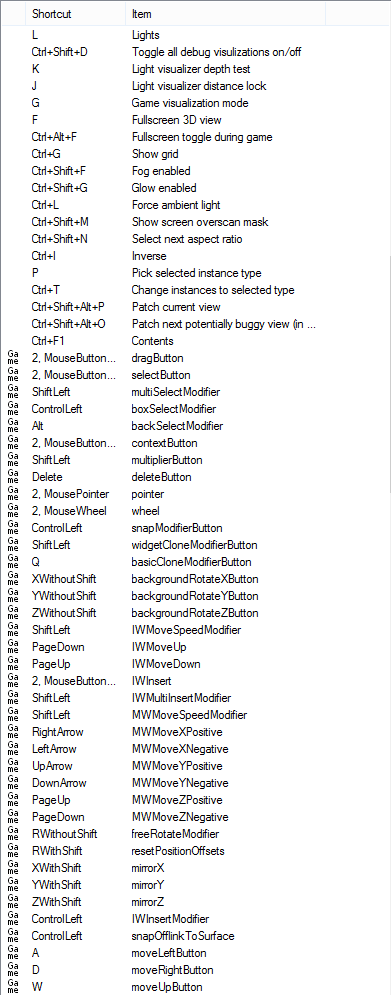
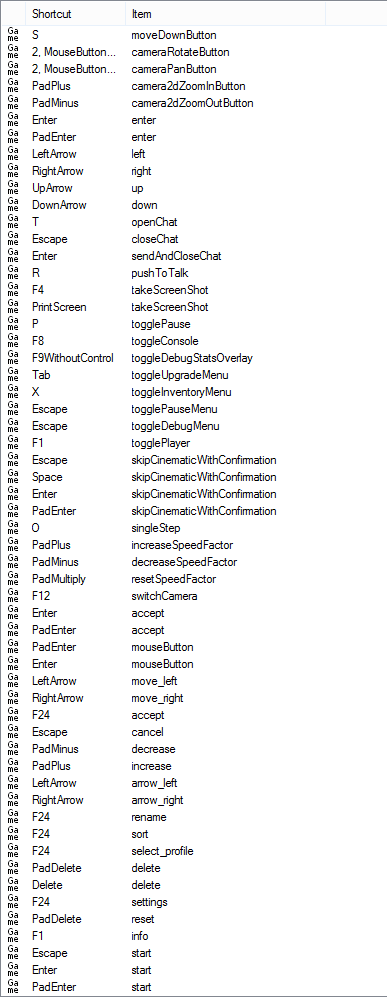
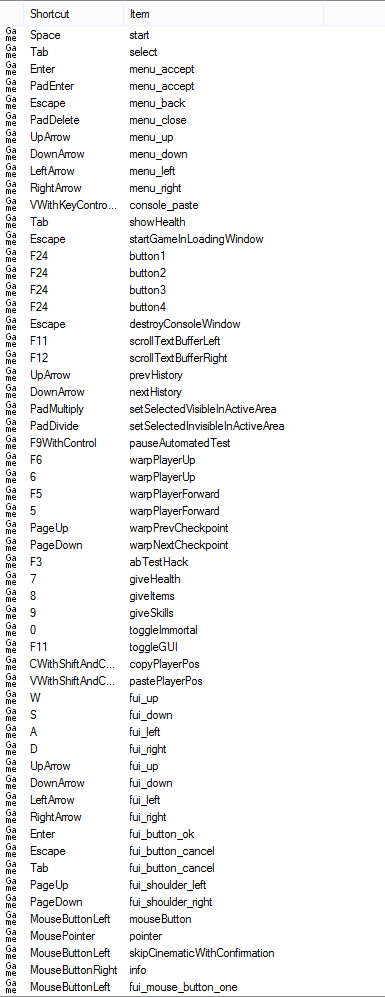
A complete list of keyboard shortcuts can be found from Help -> List of Keyboard Shortcuts."
Shadwen Editor Tutorial Main Page
-> Next tutorial (Dynamic Objects)
<- Previous tutorial (Getting Started)
